Create custom role
- On the IAM page under Access management in the sidebar menu click Roles

- Click Create role

- Select AWS account

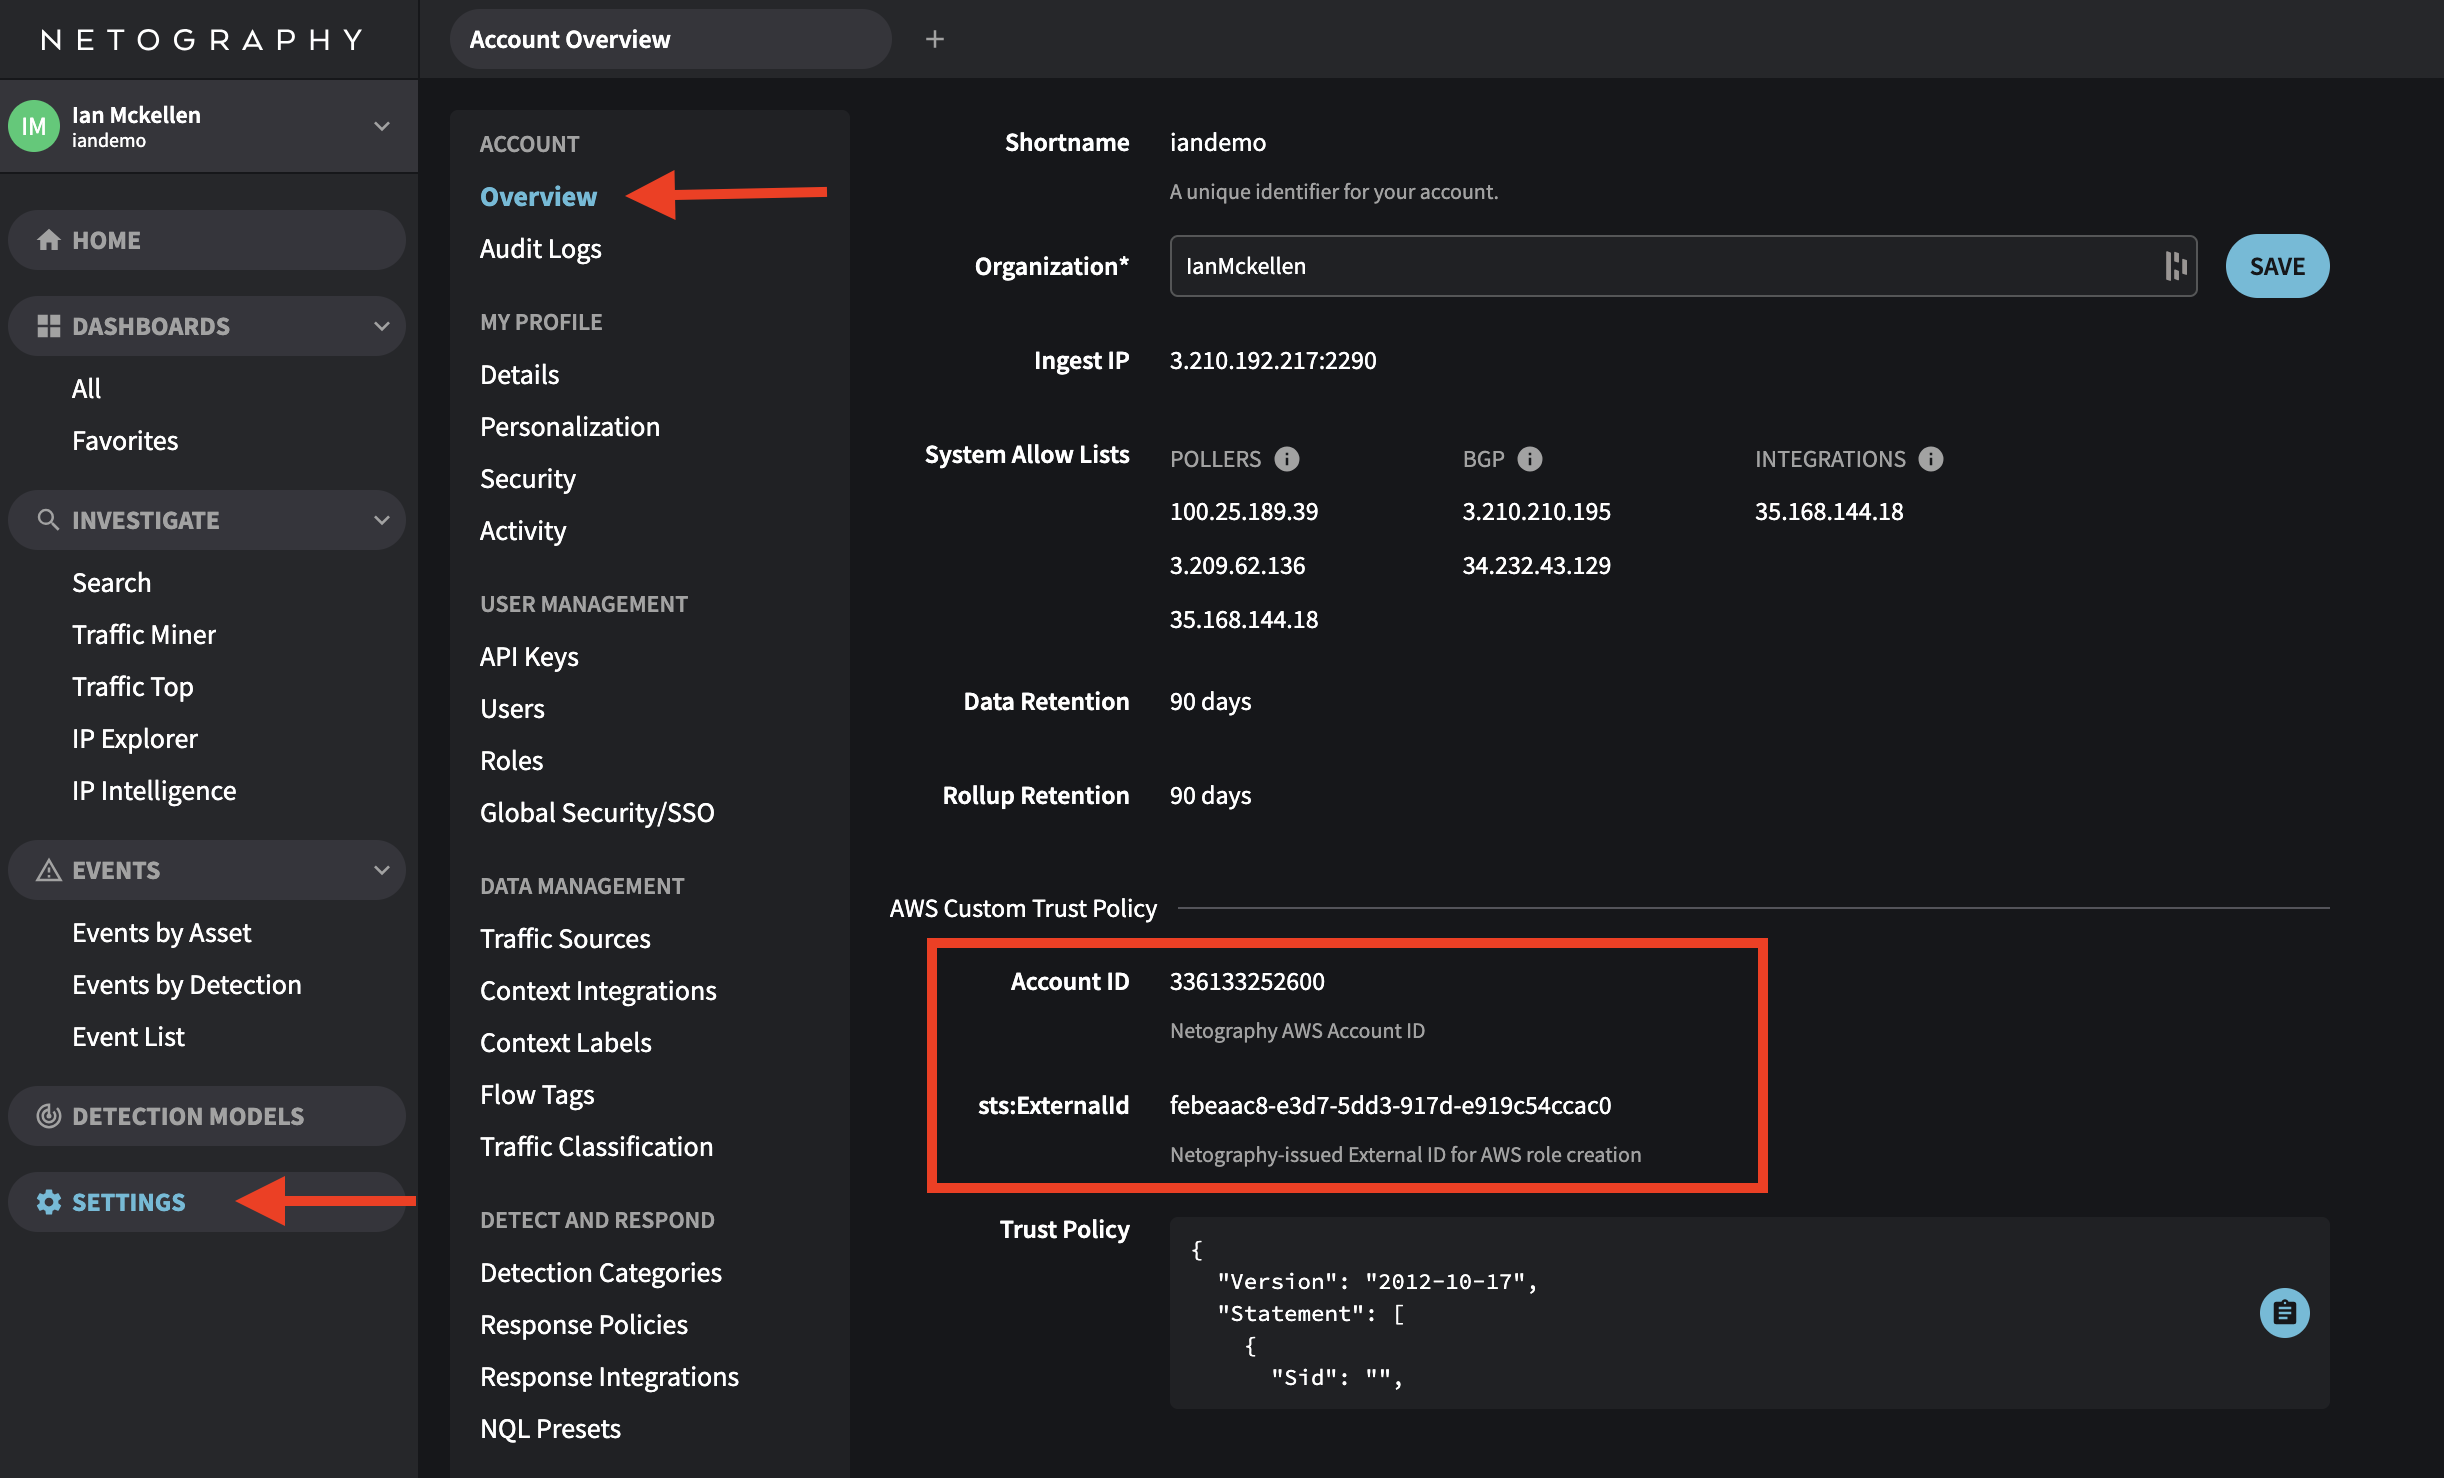
- You're going to need Netography's Account ID and the custom External ID created in your Fusion account for the next step
These settings can be found In Netography Fusion, under Settings -> Overview.

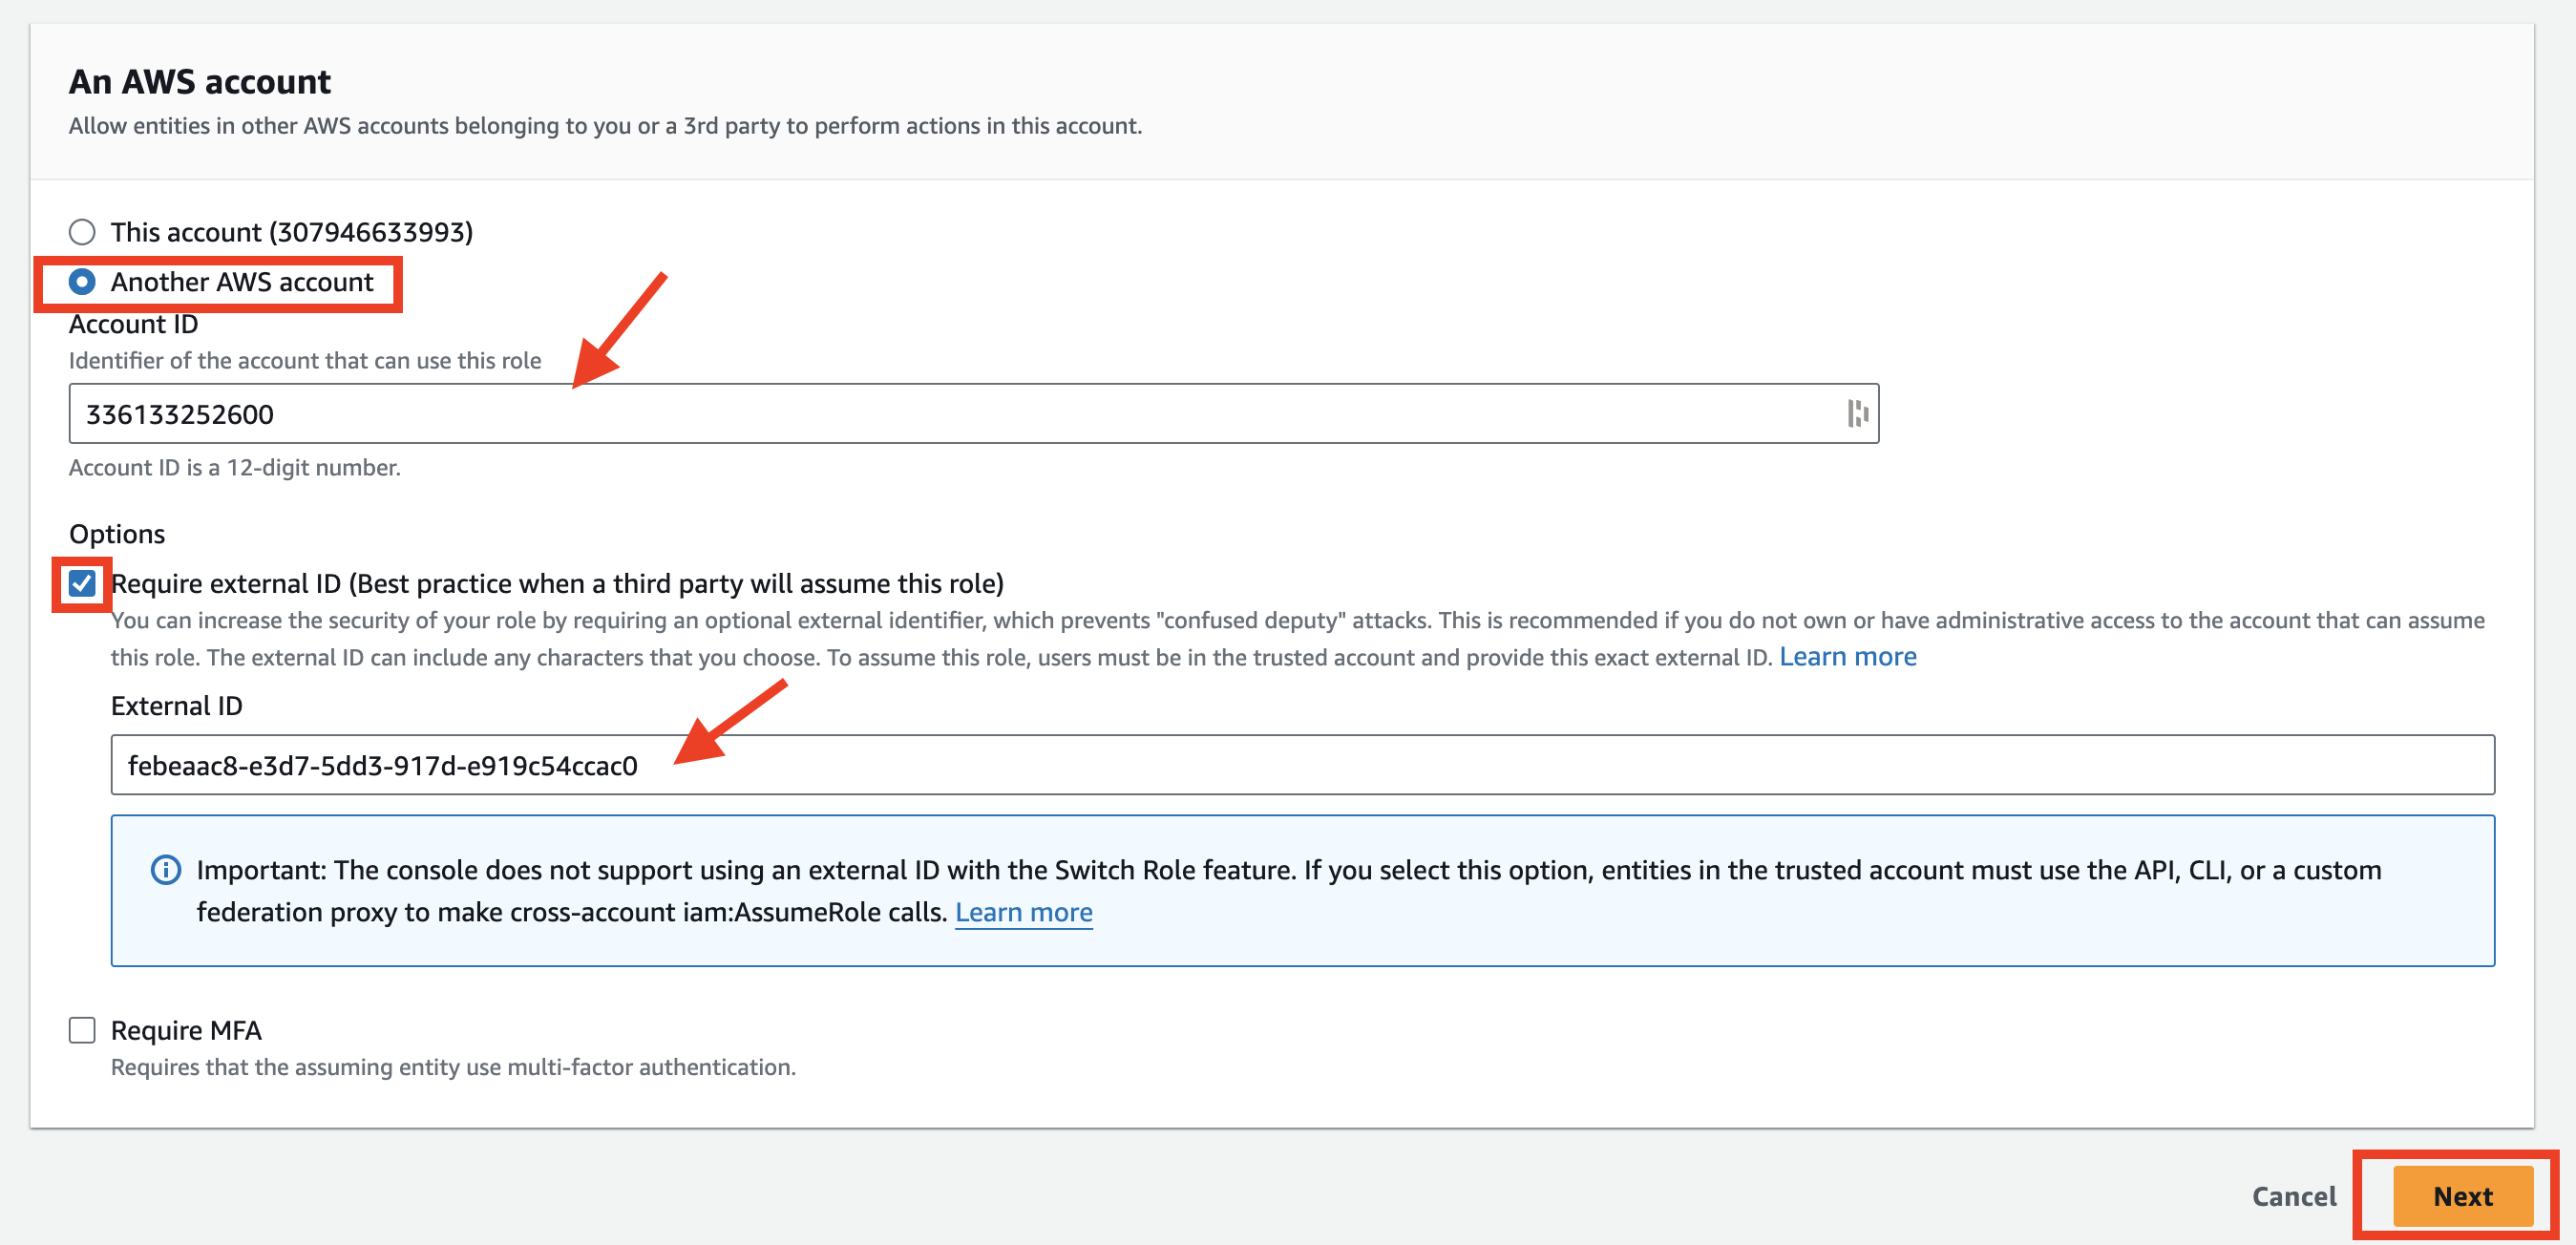
- In AWS Select Another AWS account before pasting in the Account ID you copied from Netography Fusion, then check the box for Require external ID and paste in the External ID. Click Next.

- Search for the policy name you created during the Create IAM policy step and check the box. Permissions policies should show 1.

- Search for AmazonEC2ReadOnlyAccess and check the box. Permissions Policies should show 2.
This will add permissions for context enrichment.

- Click Next

- Give your role a name.

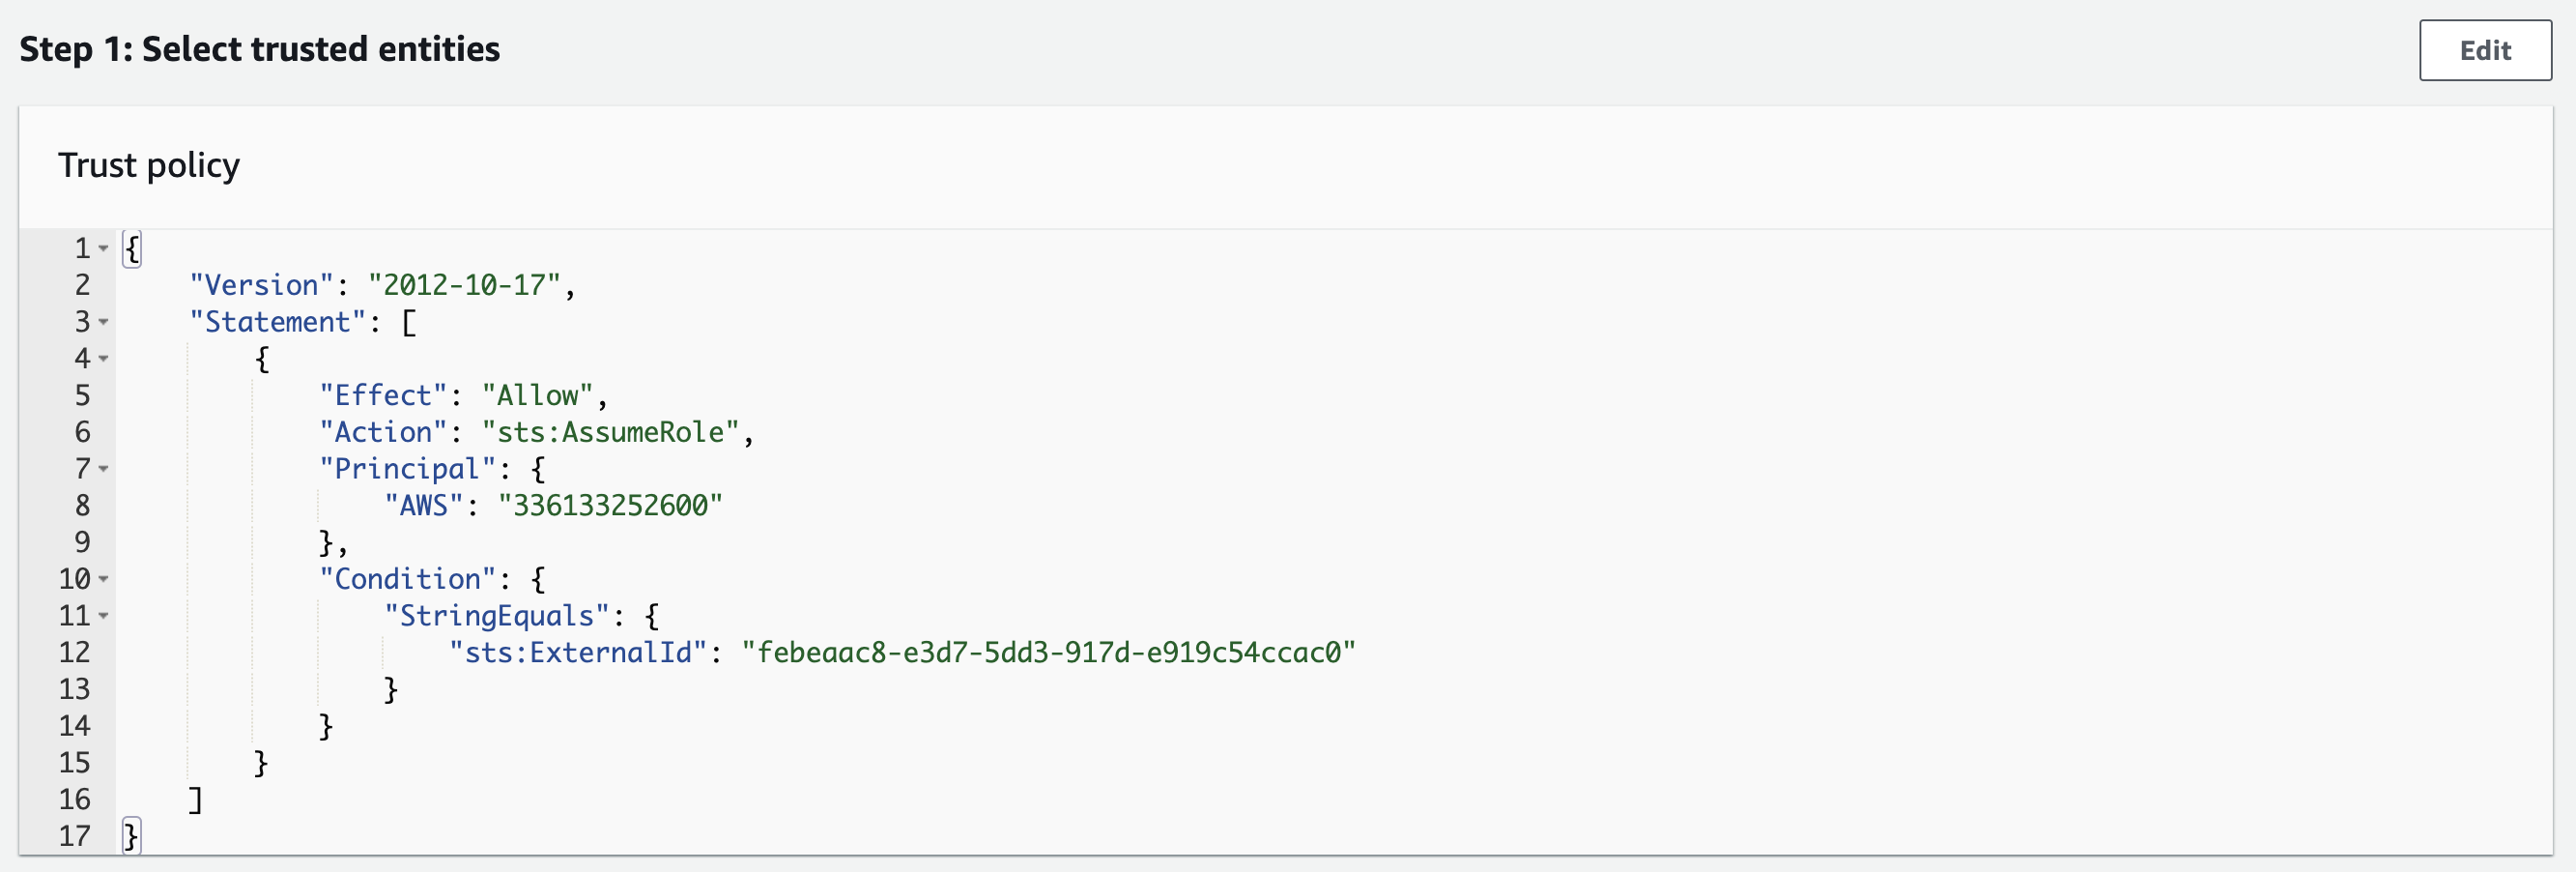
- The Trust policy is created by default and should contain the AWS Account ID and External ID you entered earlier, nothing needs to be done here, it's just to verify everything looks correct.

- Click Create role

- Next you'll need to copy and save the ARN of your newly created role, this is going to be needed to authenticate Netography Fusion in a later step. Search for the name you gave your role and click your role name.

- Copy and save your role ARN for later.

Updated about 1 year ago
