Add context integration to Fusion
You need a GCP service account to setup a context integration.
Follow the initial steps below to create one.
1. Create a GCP service account
- Go to the Service Accounts page

- Click Create Service Account and follow the steps in the wizard.

- Create a service account name; your service account ID email address will be auto-created for you.

- Click Select a role, use the Filter, type viewer into the filter, click Viewer to give this service account a Viewer role.

Leave the rest set as default.
2. Create your service account access keys and export a JSON file
The following steps will enable you to automate context configuration in Netography Fusion.
- Click : to access Actions for your newly created service account, then select Manage keys.

- Click the Add Key menu and select Create new key

- Choose JSON format. This will enable you to export a file that will automate context configuration in Netography Fusion and reduce setup to one step.
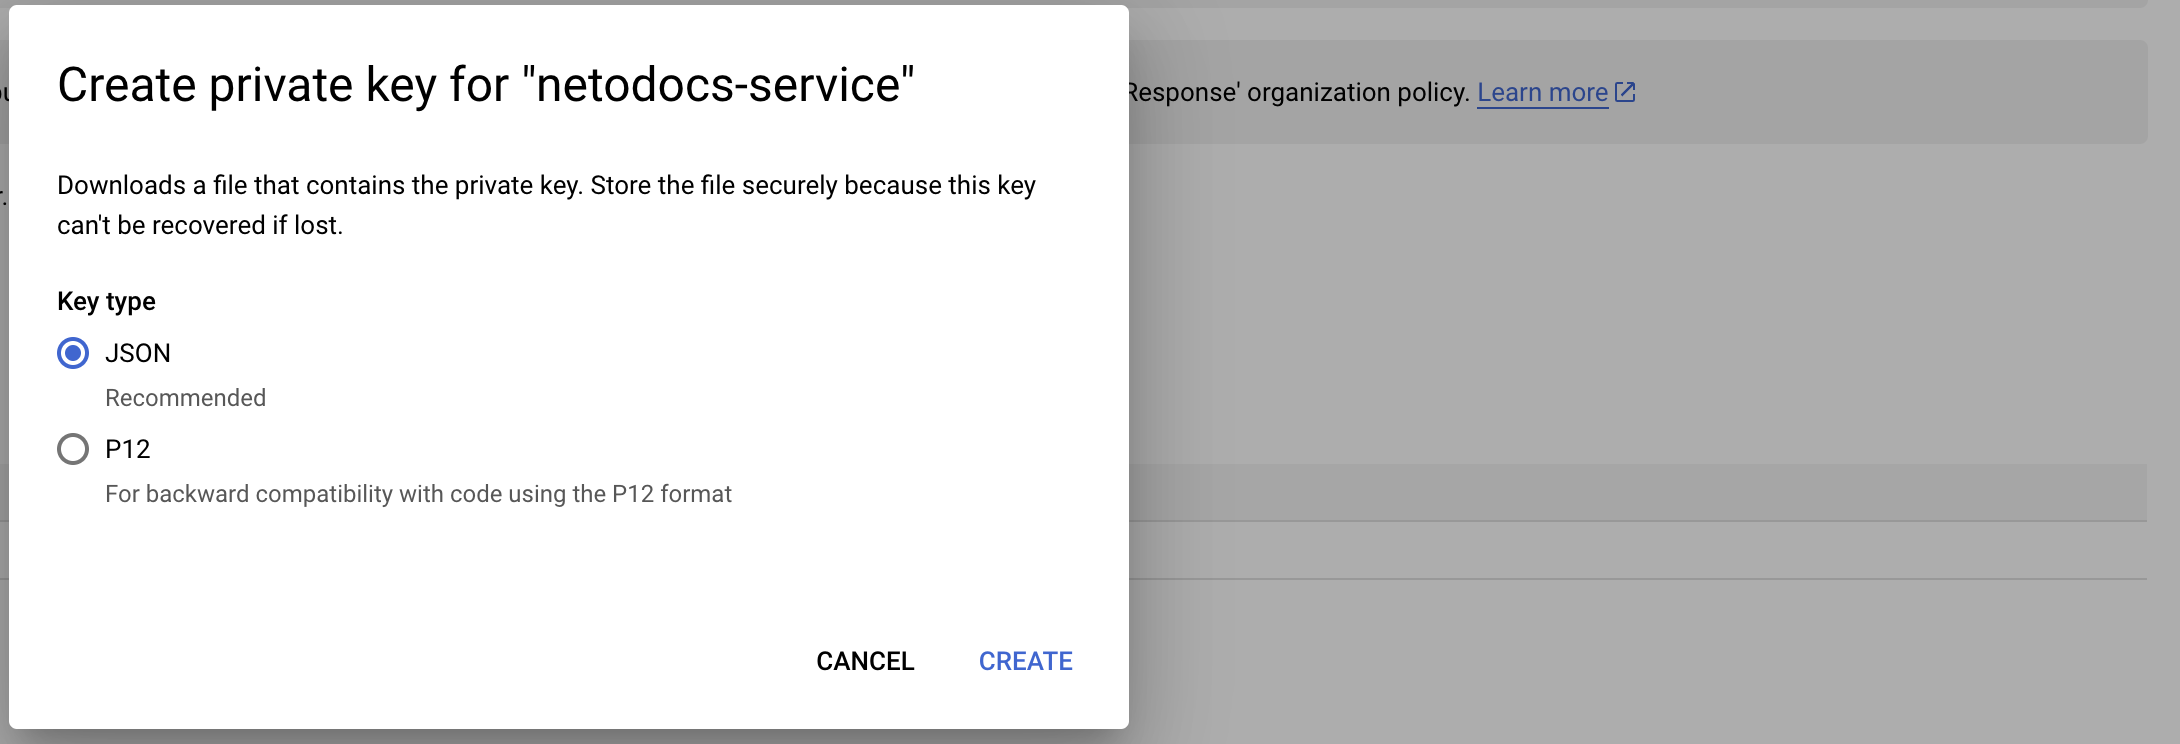
- The JSON file containing your private key will be auto-downloaded to your computer, delete this file once you're done with it.

3. Create a new Context Integration in Netography Fusion and upload your JSON file.
- In the Fusion portal, click the ⚙️ -> Settings -> Traffic Sources -> Context Integrations -> Add Integrations
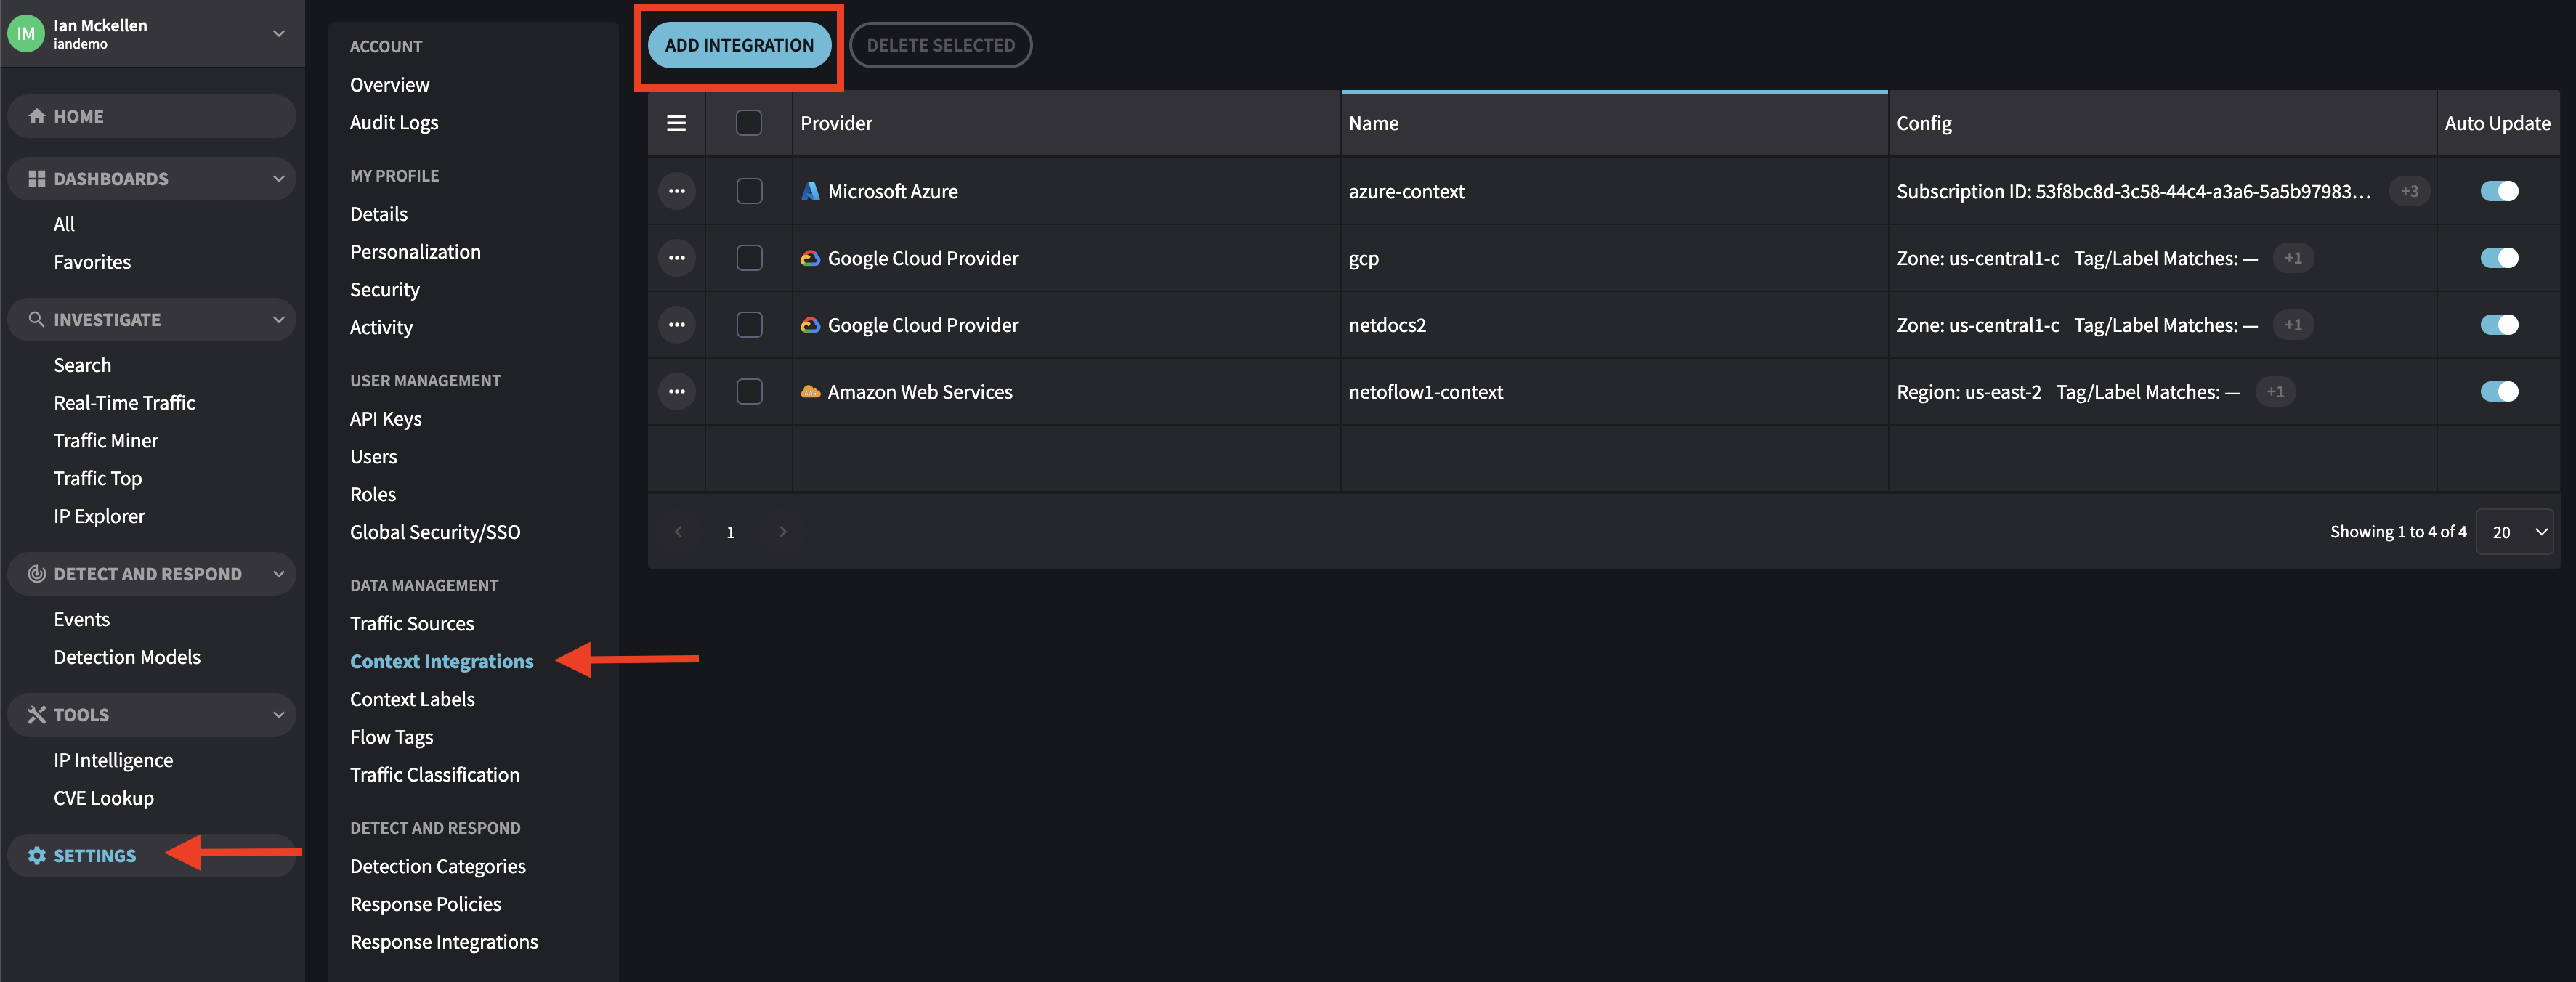
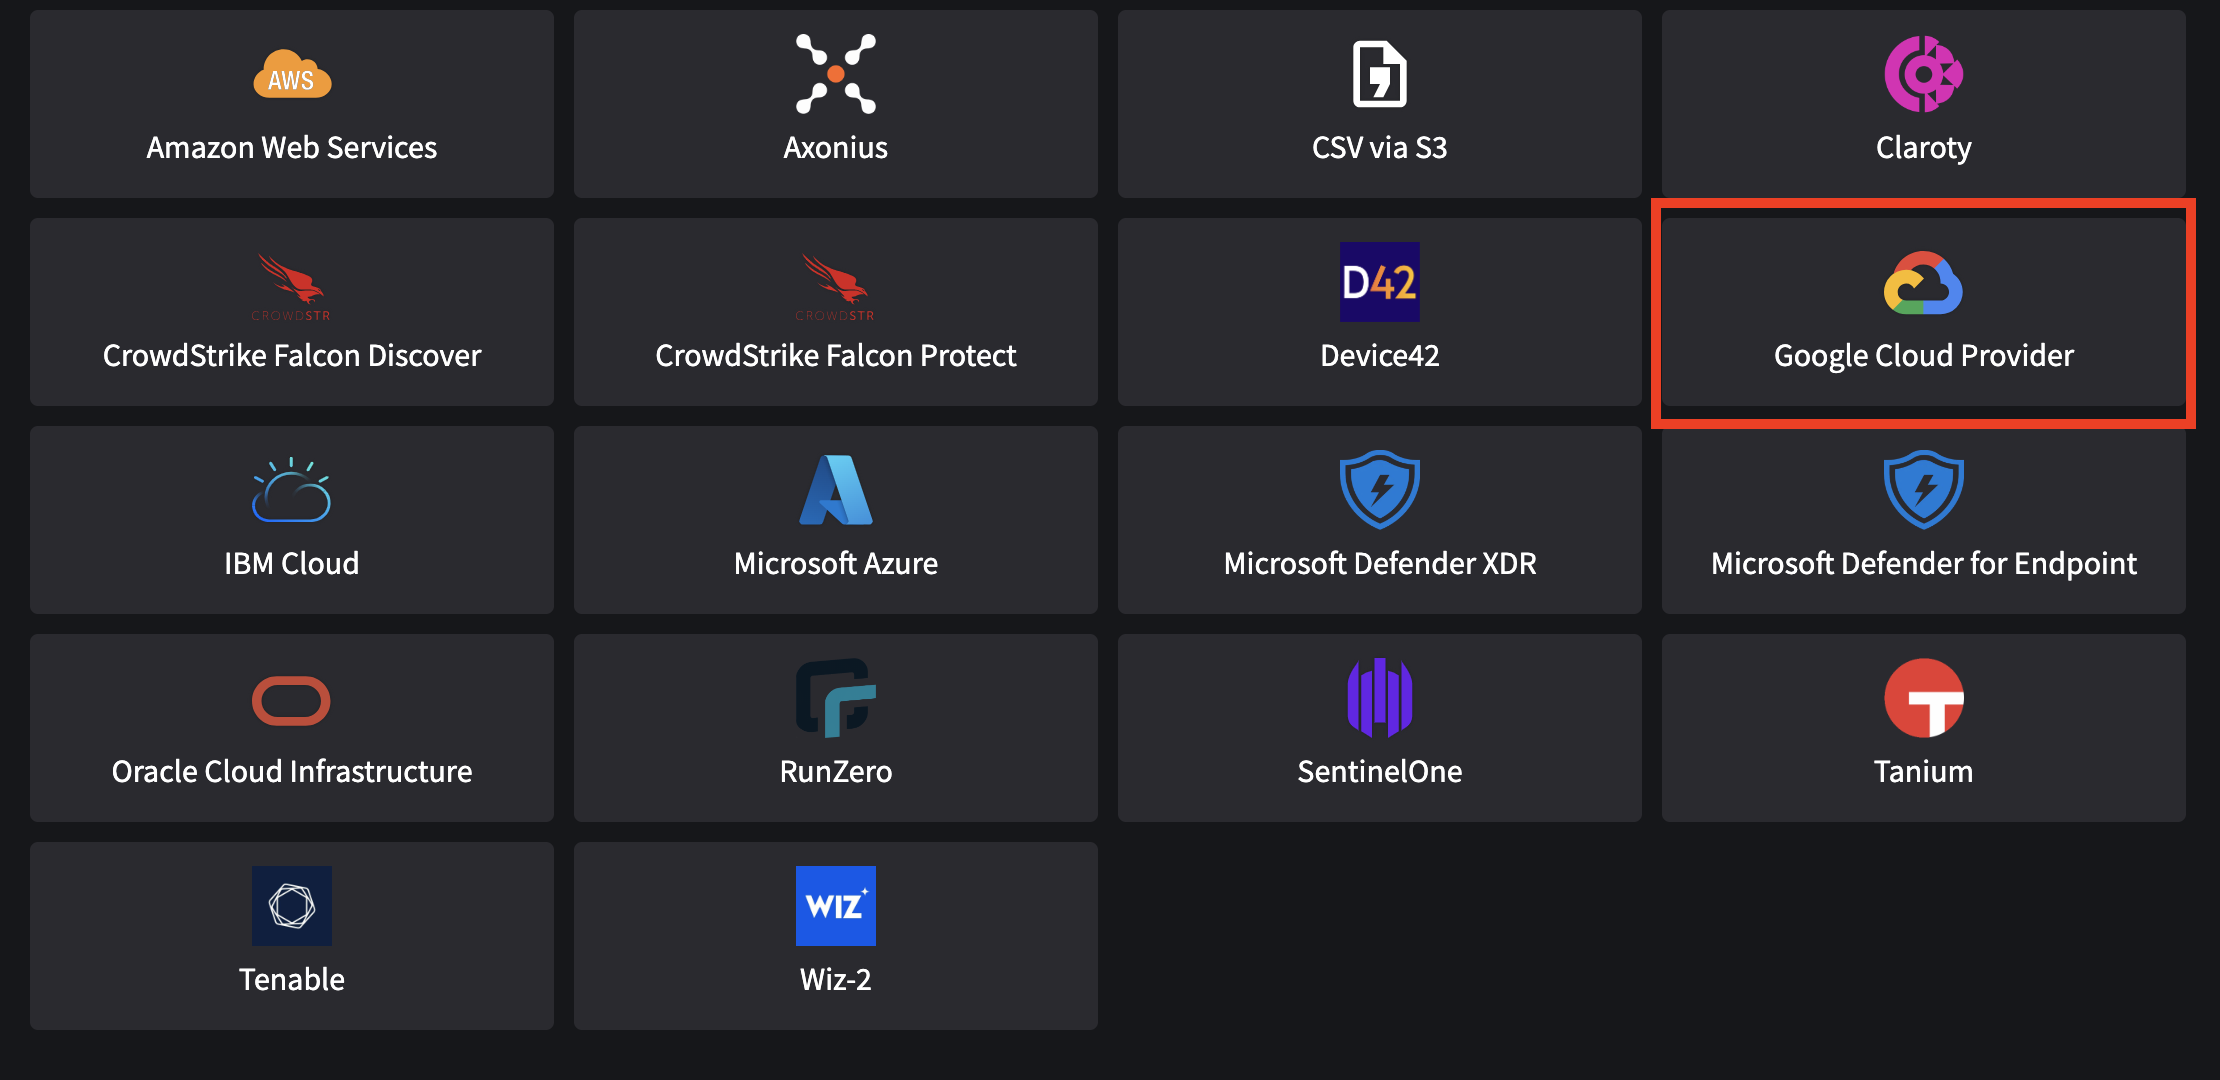
- Select Google Cloud Provider
- Use the "IMPORT FROM JSON" button to import your JSON file you exported from GCP.

- Leave Zone blank to automatically include all zones.
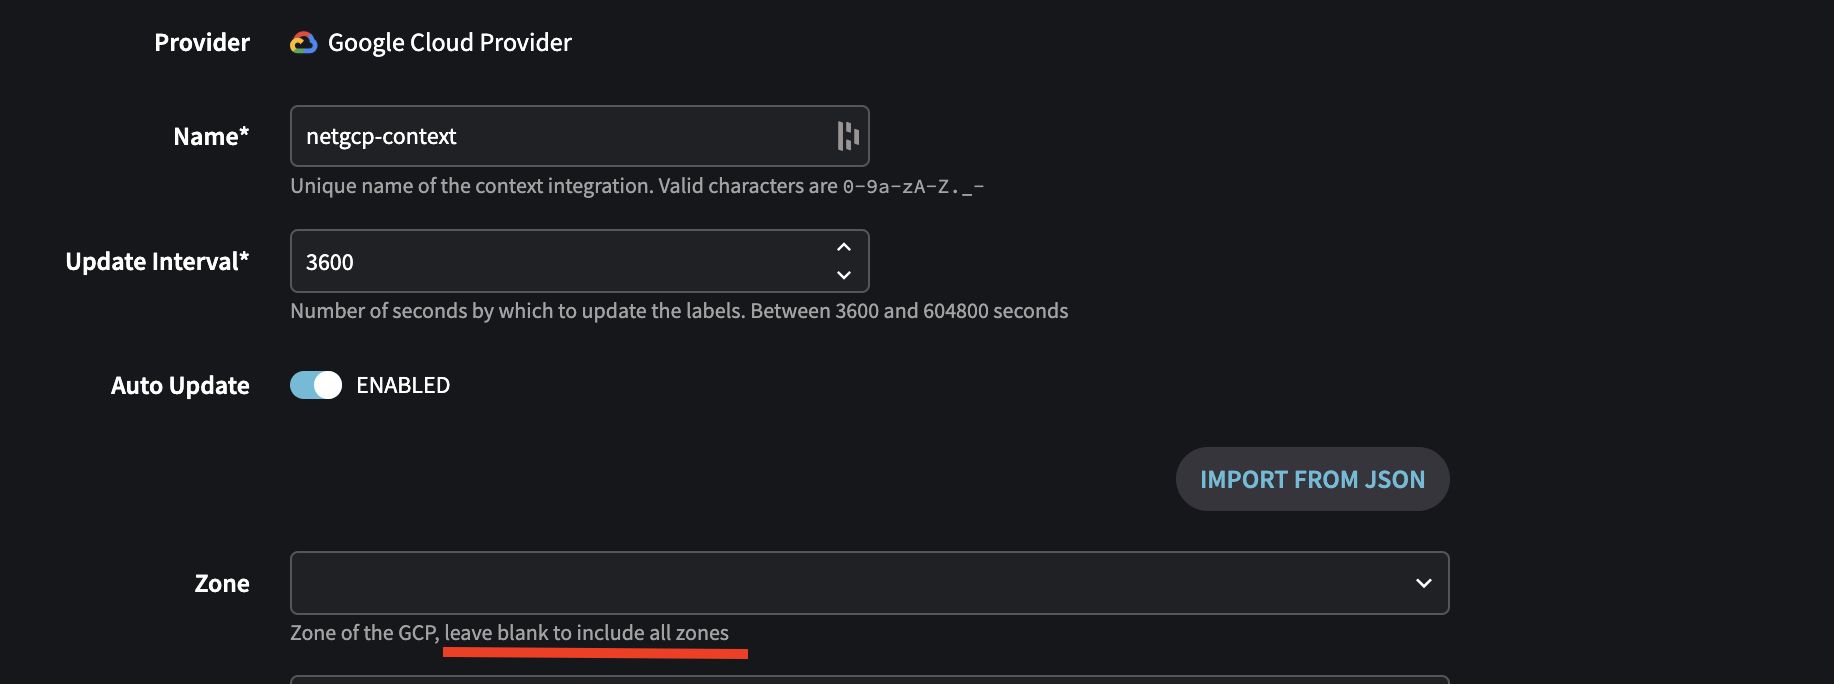
- All fields will be auto-completed and your private key will be imported.
- Click Create and Run to save.

You're done!
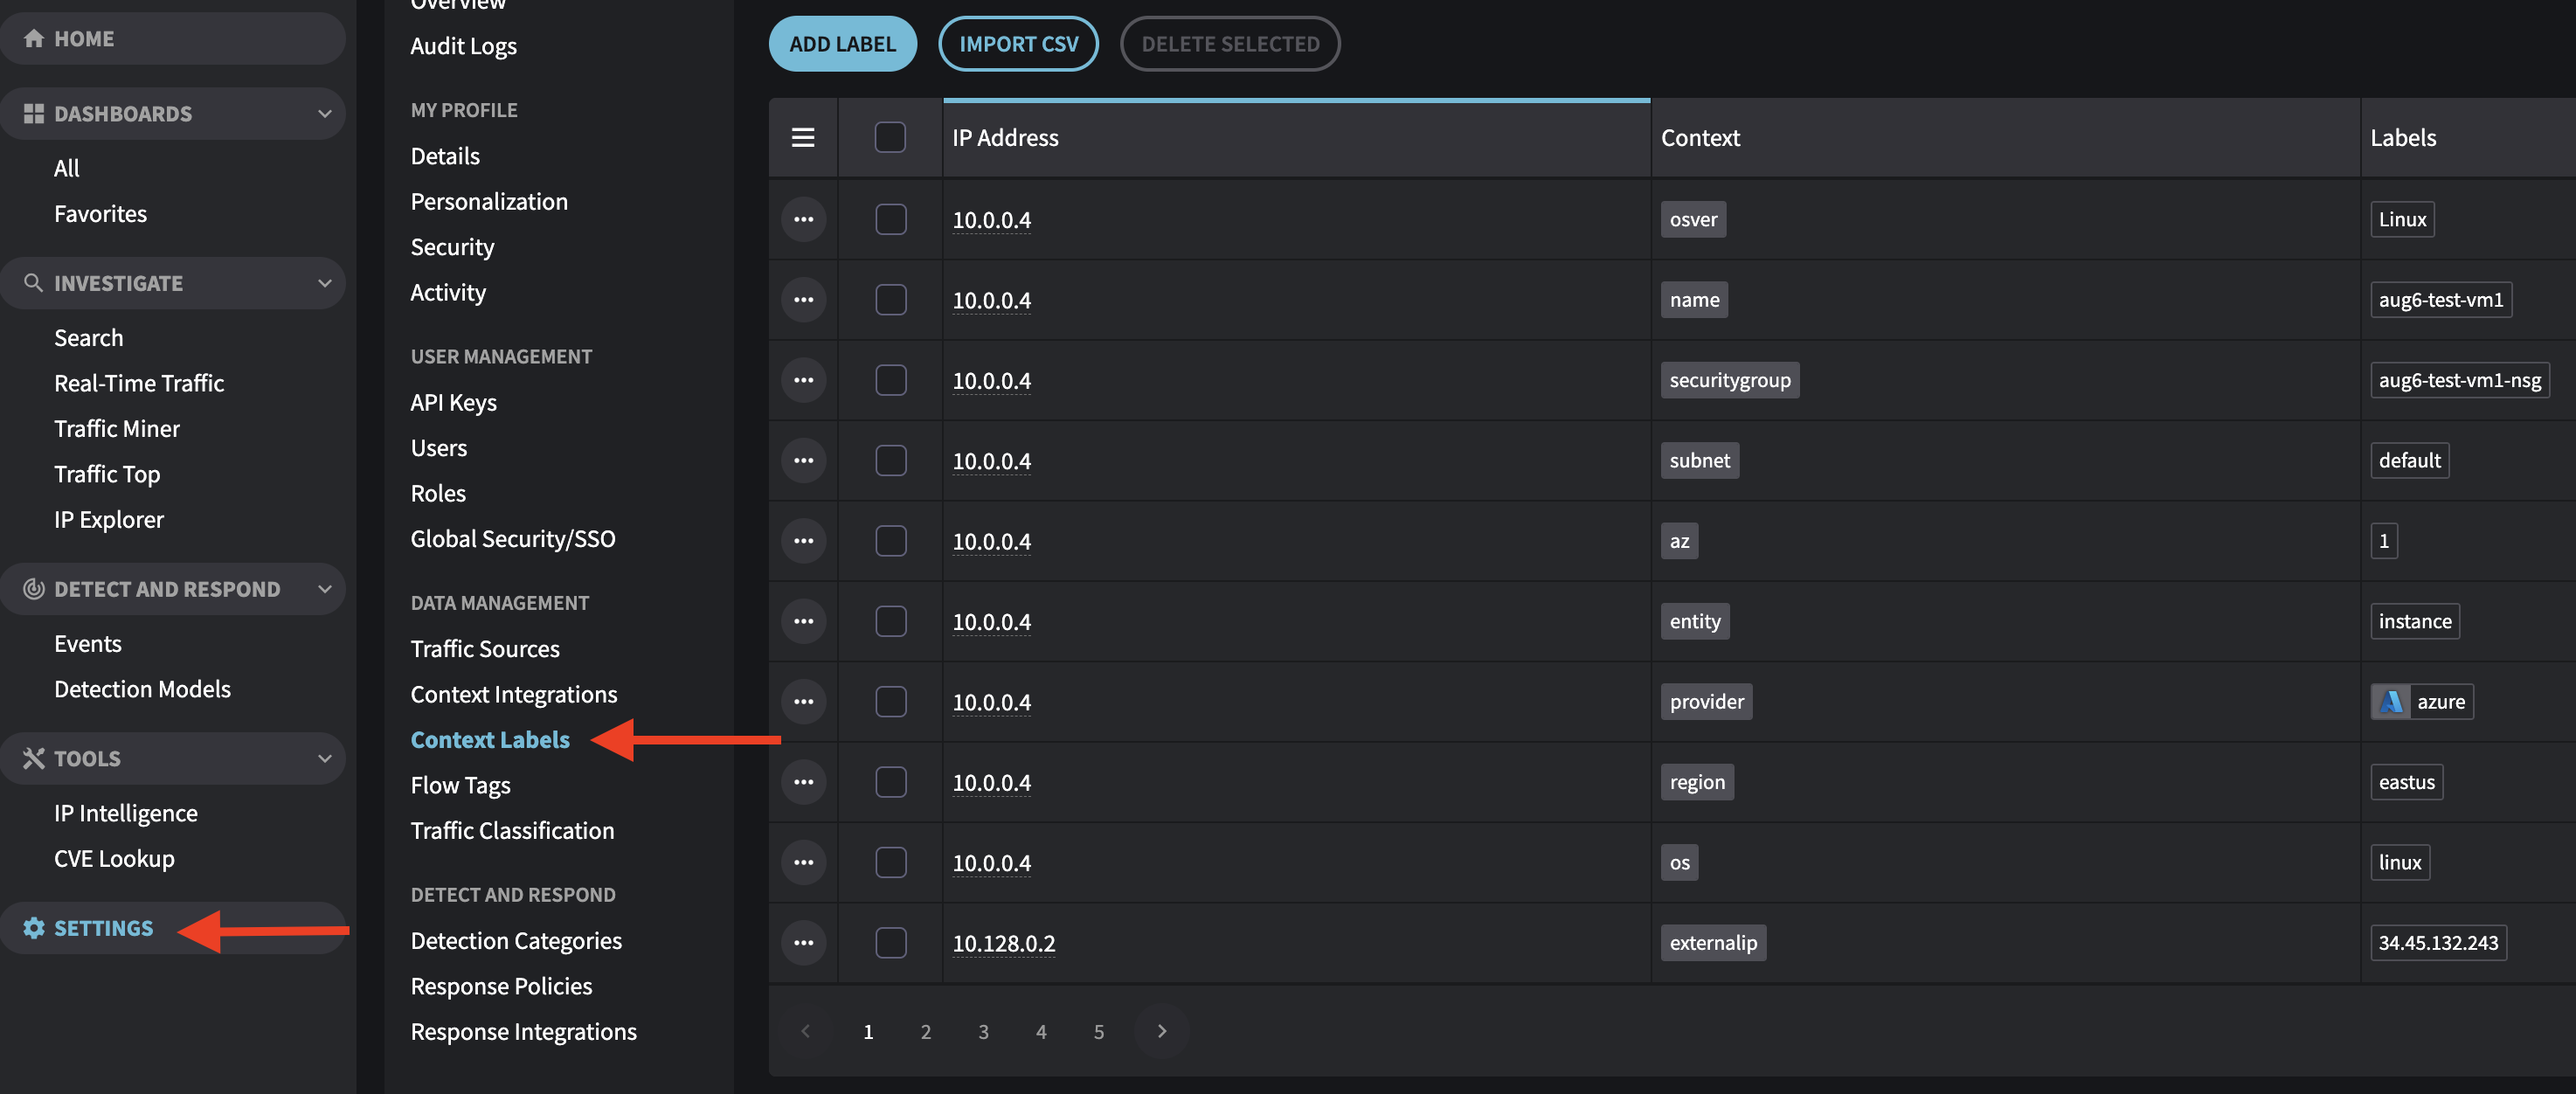
Check Context Labels to verify your context integration is working as expected
Updated about 1 year ago
