Add Context Integration to Fusion
Access Azure Cloud Shell to run CLI commands from your web browser using az.
- Create a new App Registration with 'accounts in this organizational directory only' preselected.
You can use any Display Name you want. For this example, we'll use netography-context.
az ad app create --display-name netography-context --sign-in-audience AzureADMyOrg
- Print the Application (Client) ID and save it, this is needed for the following steps.
az ad app list --display-name netography-context --query "[].{appId:appId}" --output tsv
Save the password provided by the output from the following command
You will only be shown this one time and can never retrive this again, including from the Azure Portal UI.
This password is the Client Secret Value needed by Netography Fusion.
- Create a Client Secret and set the expiration date consistent with your company policies; for this example, we'll choose 24 months, which is the maximum.
az ad app credential reset --id <Your appID> --append --end-date "2026-10-23"
Your output should look similar to the following, make sure you save the password:
The output includes credentials that you must protect. Be sure that you do not include these credentials in your code or check the credentials into your source control. For more information, see https://aka.ms/azadsp-cli
{
"appId": "XXXXX-XXXX-XXXX-XXXX-XXXXXXXXX",
"password": "XXXX~XXXXXXXXXXXX.dIc~XXXXXXXXX",
"tenant": "XXXXXX-XXXX-XXXX-XXXX-XXXXXXXXXX"
}
- Retrieve the Object ID of your App Registration, which is needed to create a Service Principal in the next step.
az ad app show --id <Your appID> --query "id"
- Create a Service Principal for your App Registration, this is required for the the next step.
az ad sp create --id <Your App Registration Object ID>
- Retrieve the Object ID of your Service Principal, this is required for the Role Assignment step.
az ad sp show --id <Your appID> --query "id"
- Retrieve the Subscription ID we're working in, this is required for the Role Assignment step.
az account show --query id --output tsv
- Select the Role Assignment for your App Registration.
az role assignment create --assignee-object-id <Your Service Principal Object ID> --role "Reader" --scope /subscriptions/<Your Subscription ID>
Add context integration to Netography Fusion
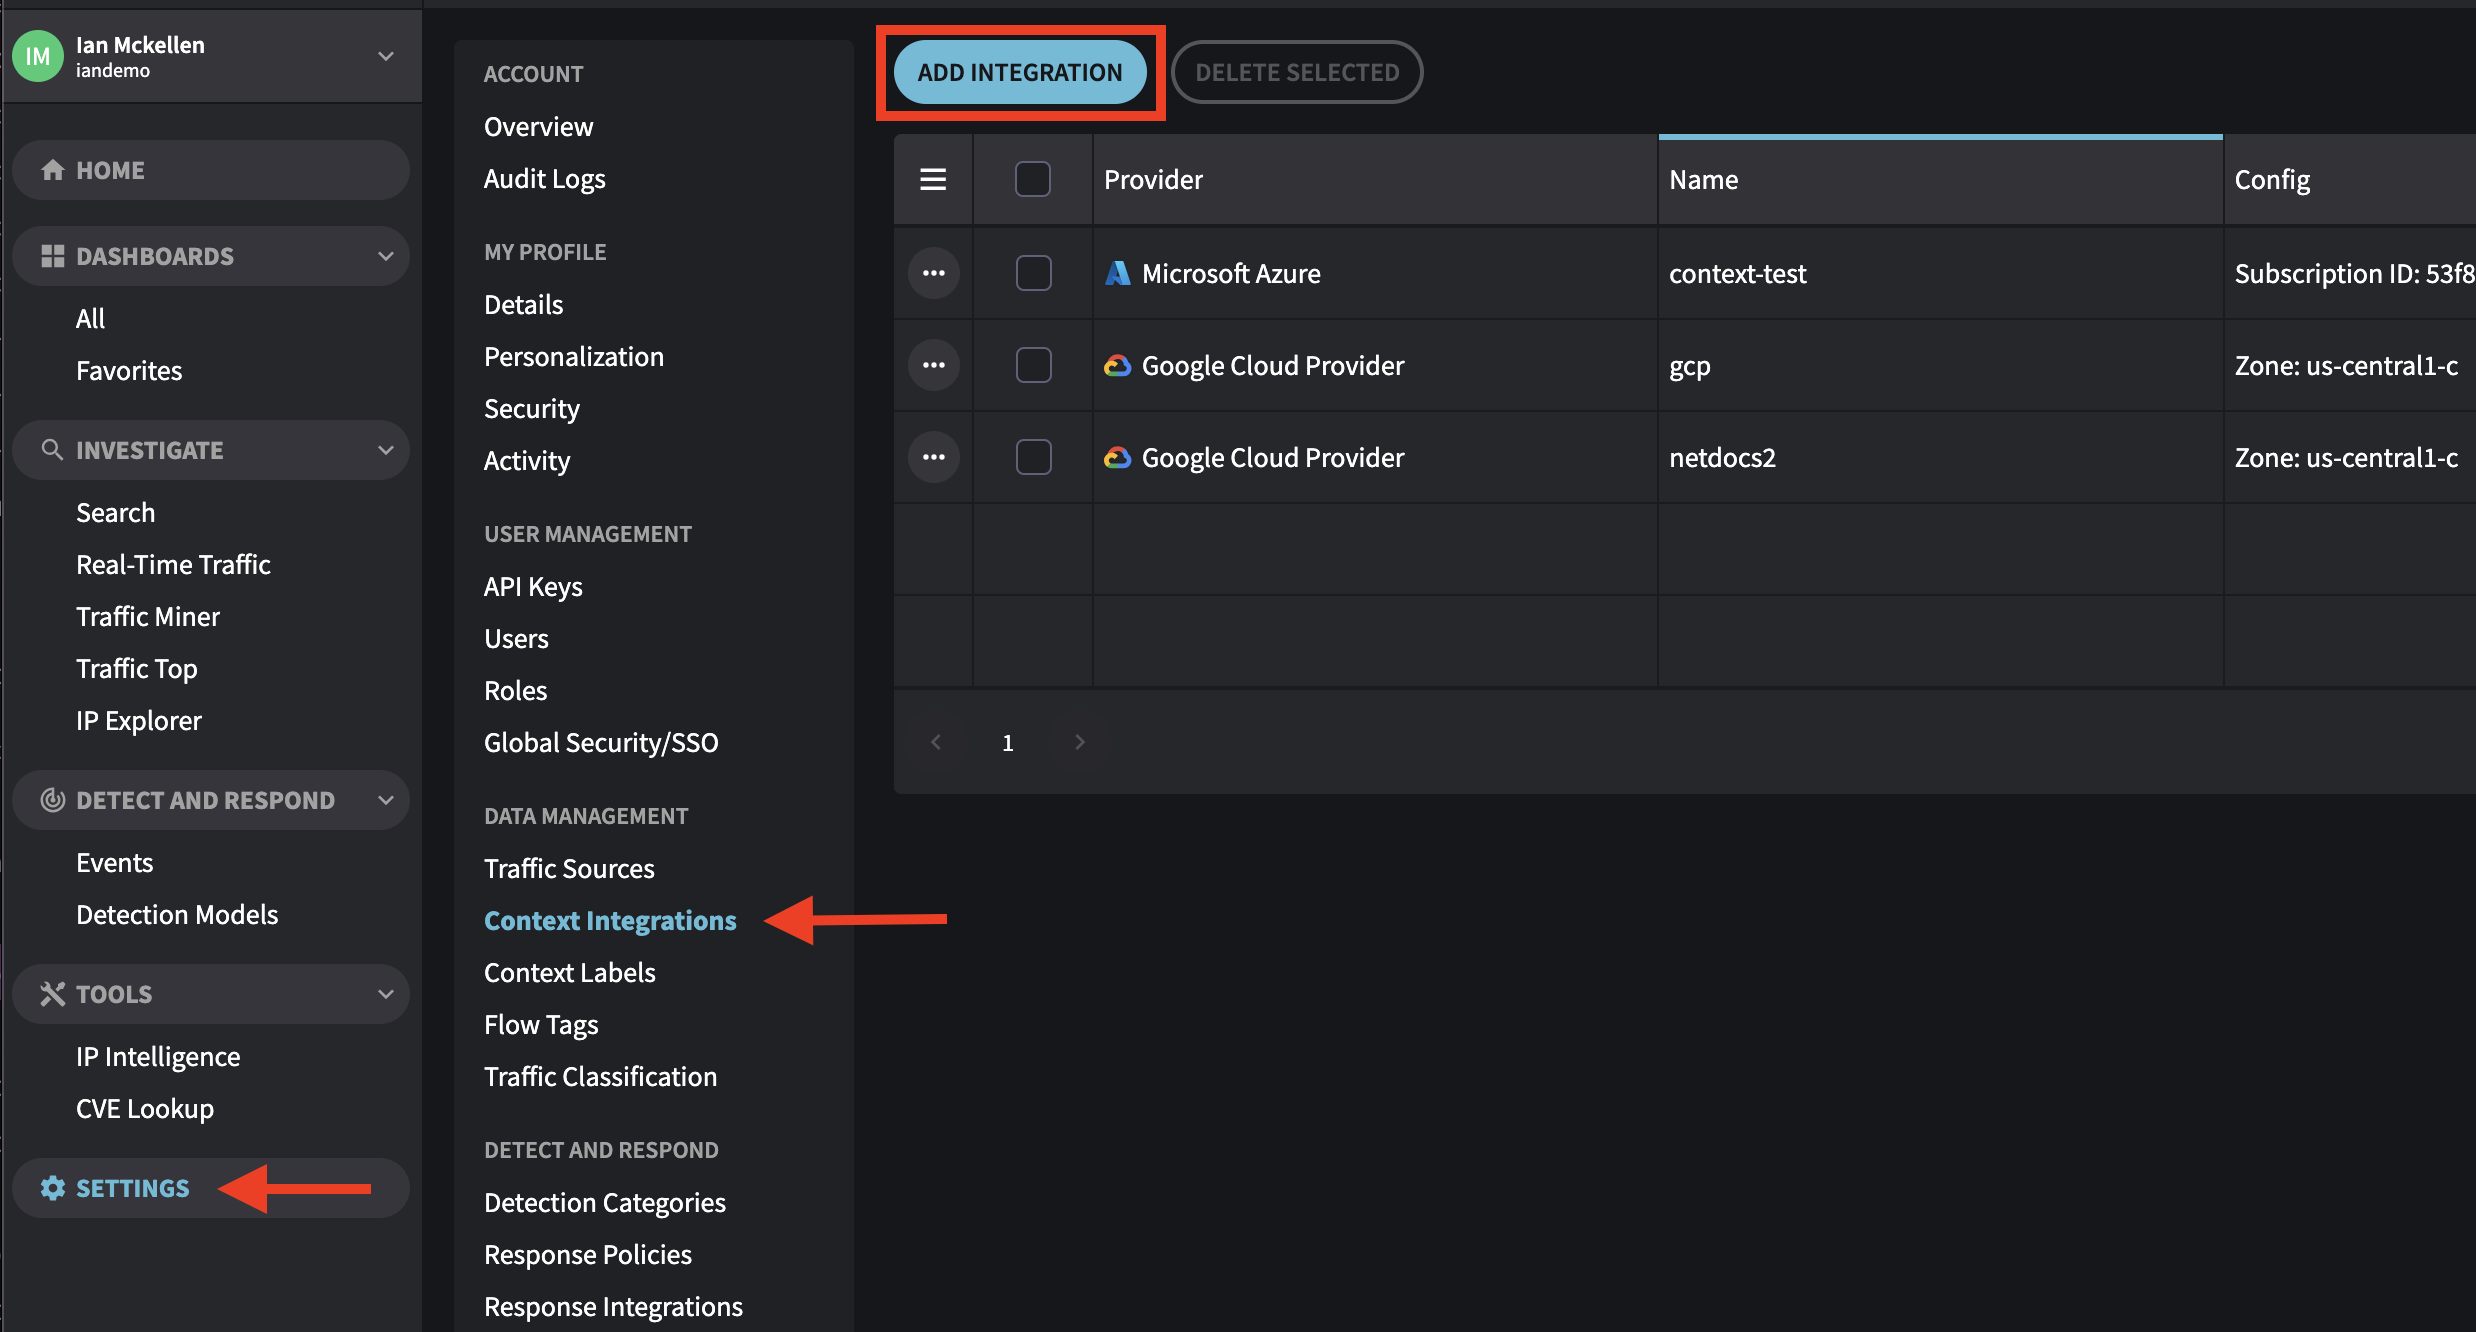
- Navigate to Settings -> Context Integrations -> Add Integration

- Select Microsoft Azure

- Fill out the Azure Context Integration form:
Name: Use any name here.
Update Interval: Leave as default.
Auto Update: Leave enabled.
Subscription ID: The Subscription ID you used to complete the instructions in this document.
Run the following command to retrieve this information:
az account show --query id --output tsv
Tenant ID: Your Azure Tenant ID.
Run the following command to retrieve this information:
az account show --query tenantId --output tsv
Tag/Label Matches: Leave as default unless you know how to use this feature.
Application Client ID: Enter the "Applicant (Client) ID"
Run the following command to retrieve this information:
az ad app list --display-name netography-context --query "[].{appId:appId}" --output tsv
Client Secret Value: This is the password you saved from Step 3 in this document.
- Click Create and Run
Updated 10 months ago
