Create the SQS queue
- Navigate to SQS in the AWS console

- Create a queue

- Give the queue a name

- Under Configuration, Set Message retention to 1 day

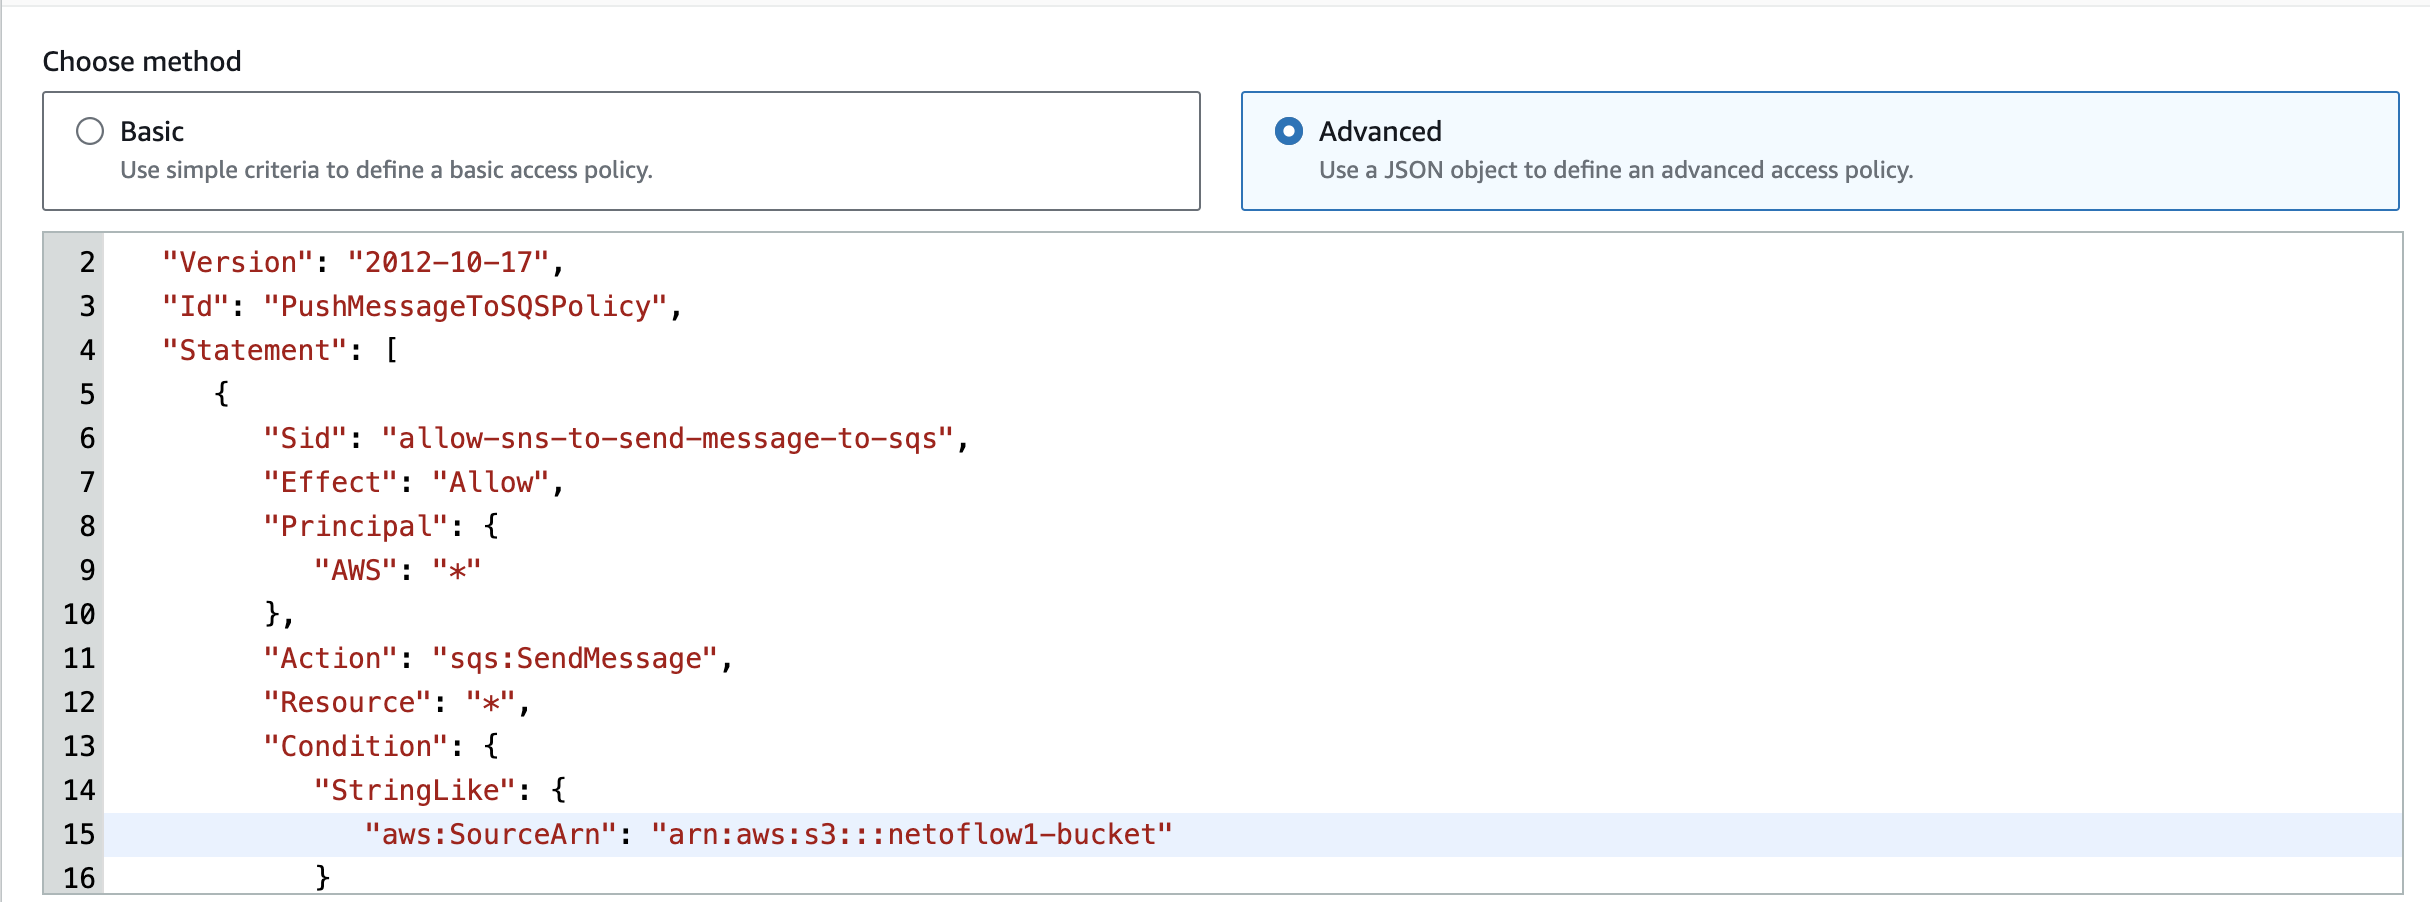
- Under Access policy, click Advanced.

- Delete the default JSON in the Advanced Access policy.
- Copy and paste in the following JSON, changing
<bucketname>to be the name of the S3 bucket you created in an earlier step.
{
   "Version": "2012-10-17",
   "Id": "PushMessageToSQSPolicy",
   "Statement": [
      {
         "Sid": "allow-sns-to-send-message-to-sqs",
         "Effect": "Allow",
         "Principal": {
            "AWS": "*"
         },
         "Action": "sqs:SendMessage",
         "Resource": "*",
         "Condition": {
            "StringLike": {
               "aws:SourceArn": "arn:aws:s3:::<bucketname>"
            }
         }
      }
   ]
}
The result should look like this:
Leave all other settings set as default, or follow the policies set by your organization.
- Click Create queue

- Save the SQS queue ARN in a text file. This will come in handy later.

Updated about 1 year ago