Context Integration in Azure Portal
- Enter App registrations in the search box at the top of the portal

- Click New registration

- Give this new application a descriptive name

- Leave Supported account type set as default

- Click Register

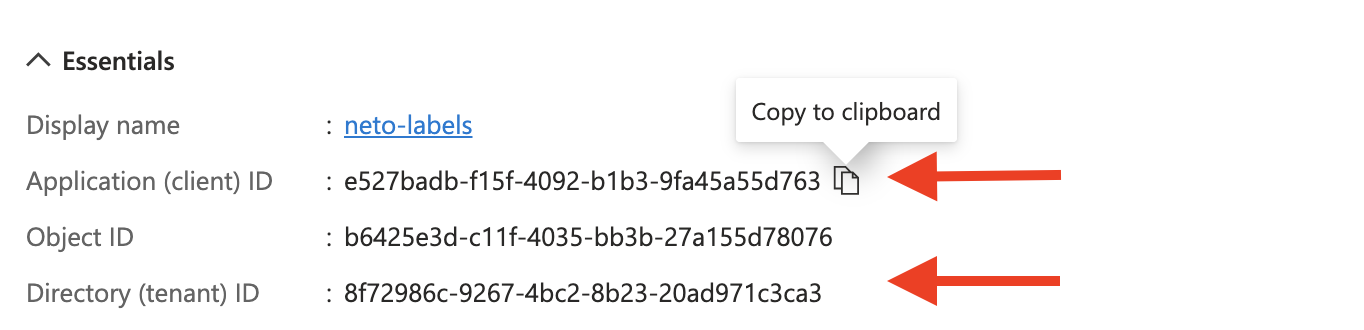
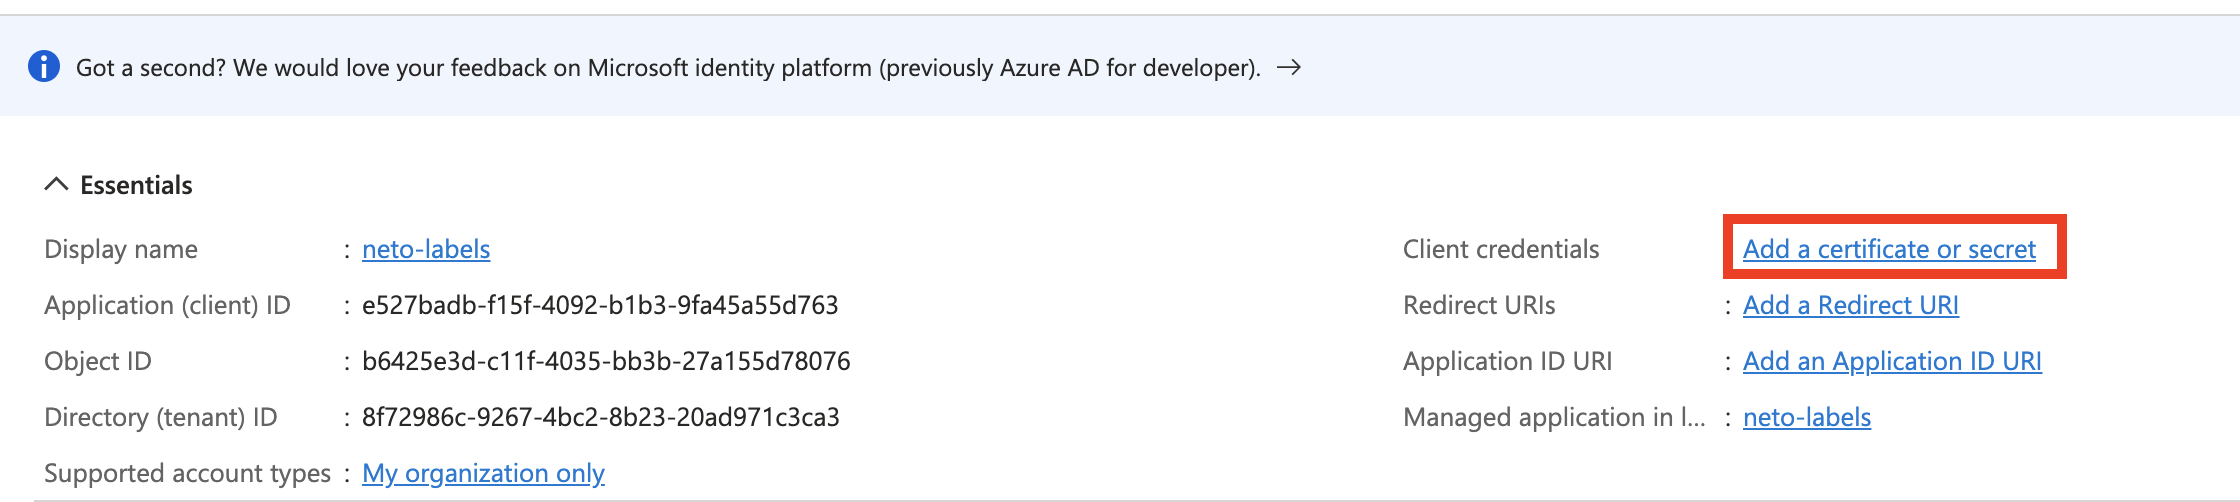
- Copy and save the Application Client ID and the Directory Tenant ID, you'll need this later for integration with Netography Fusion.
- Click Add a certificate or secret
- Click New client secret
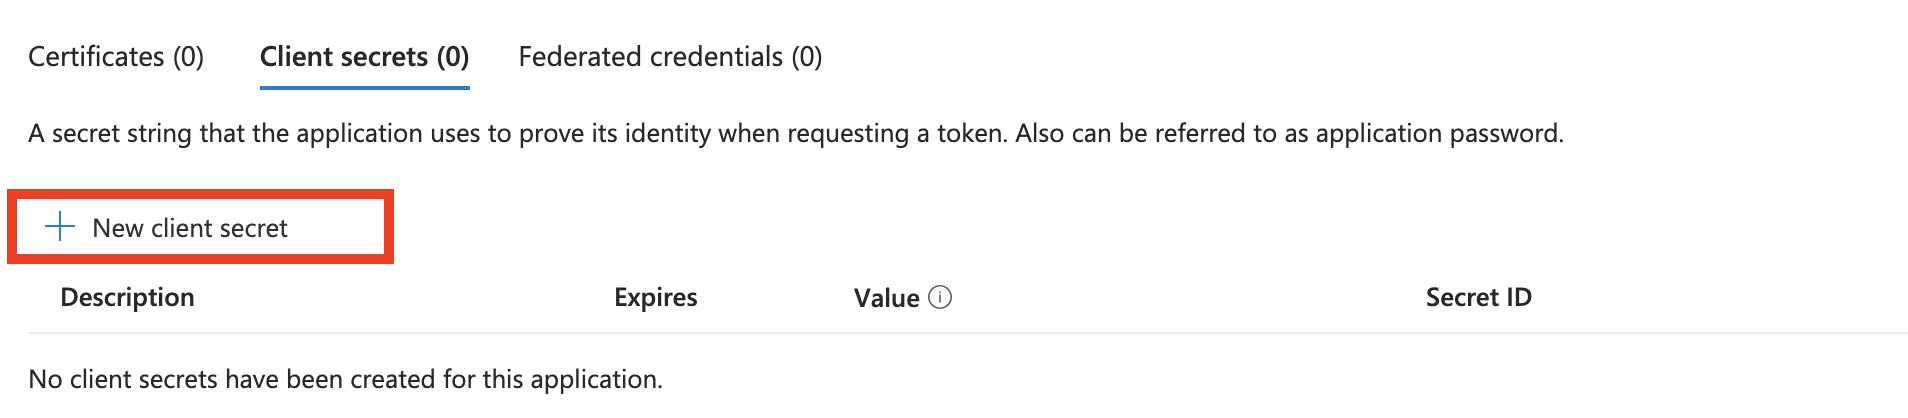
- Add a description and select an expiration consistent with the policies of your organization

- Click Add

- Copy and save the Client Secret Value, you'll need this later for integration with Netography Fusion.

- Go to Subscriptions and select your working subscription

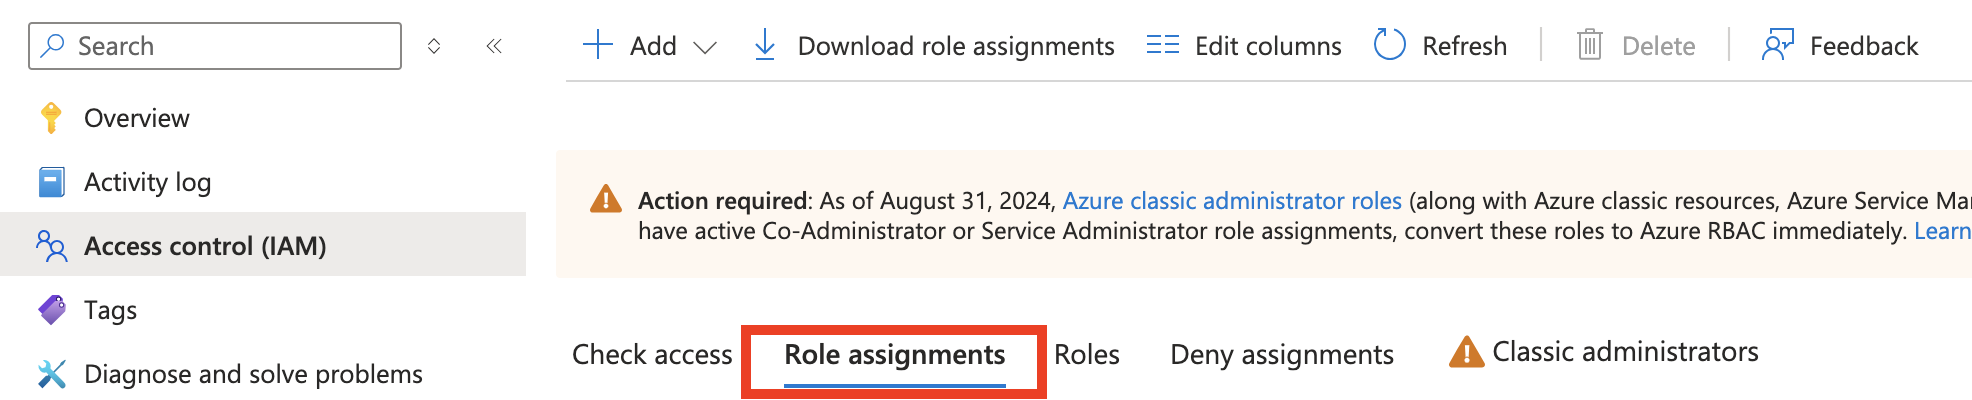
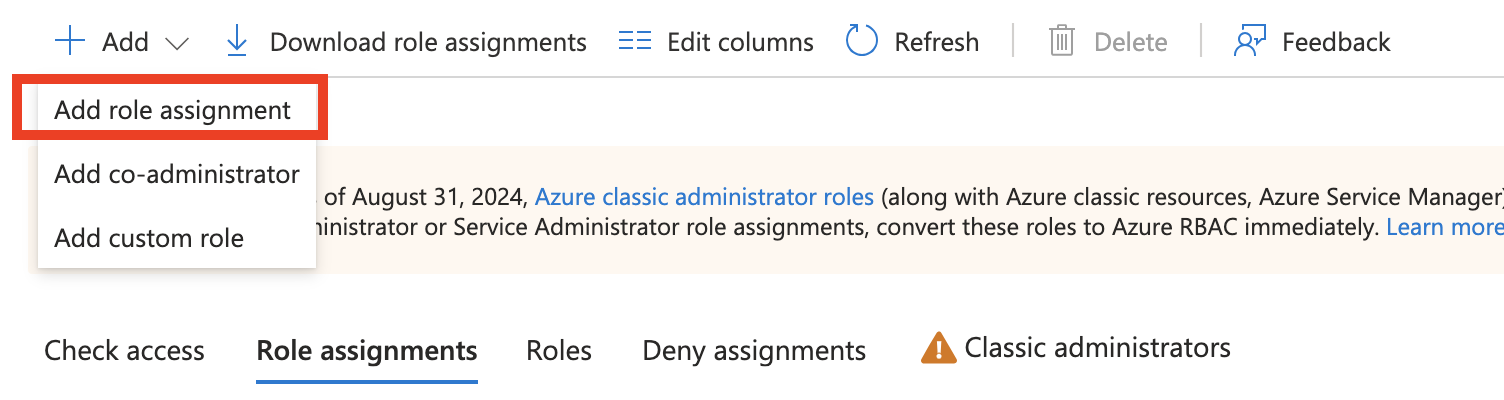
- Select Access control (IAM) from the sidebar

- Click the Role assignments tab
- Click Add then Add role assignment from the dropdown
- Search for Virtual Machine User Login and select it from the returned results
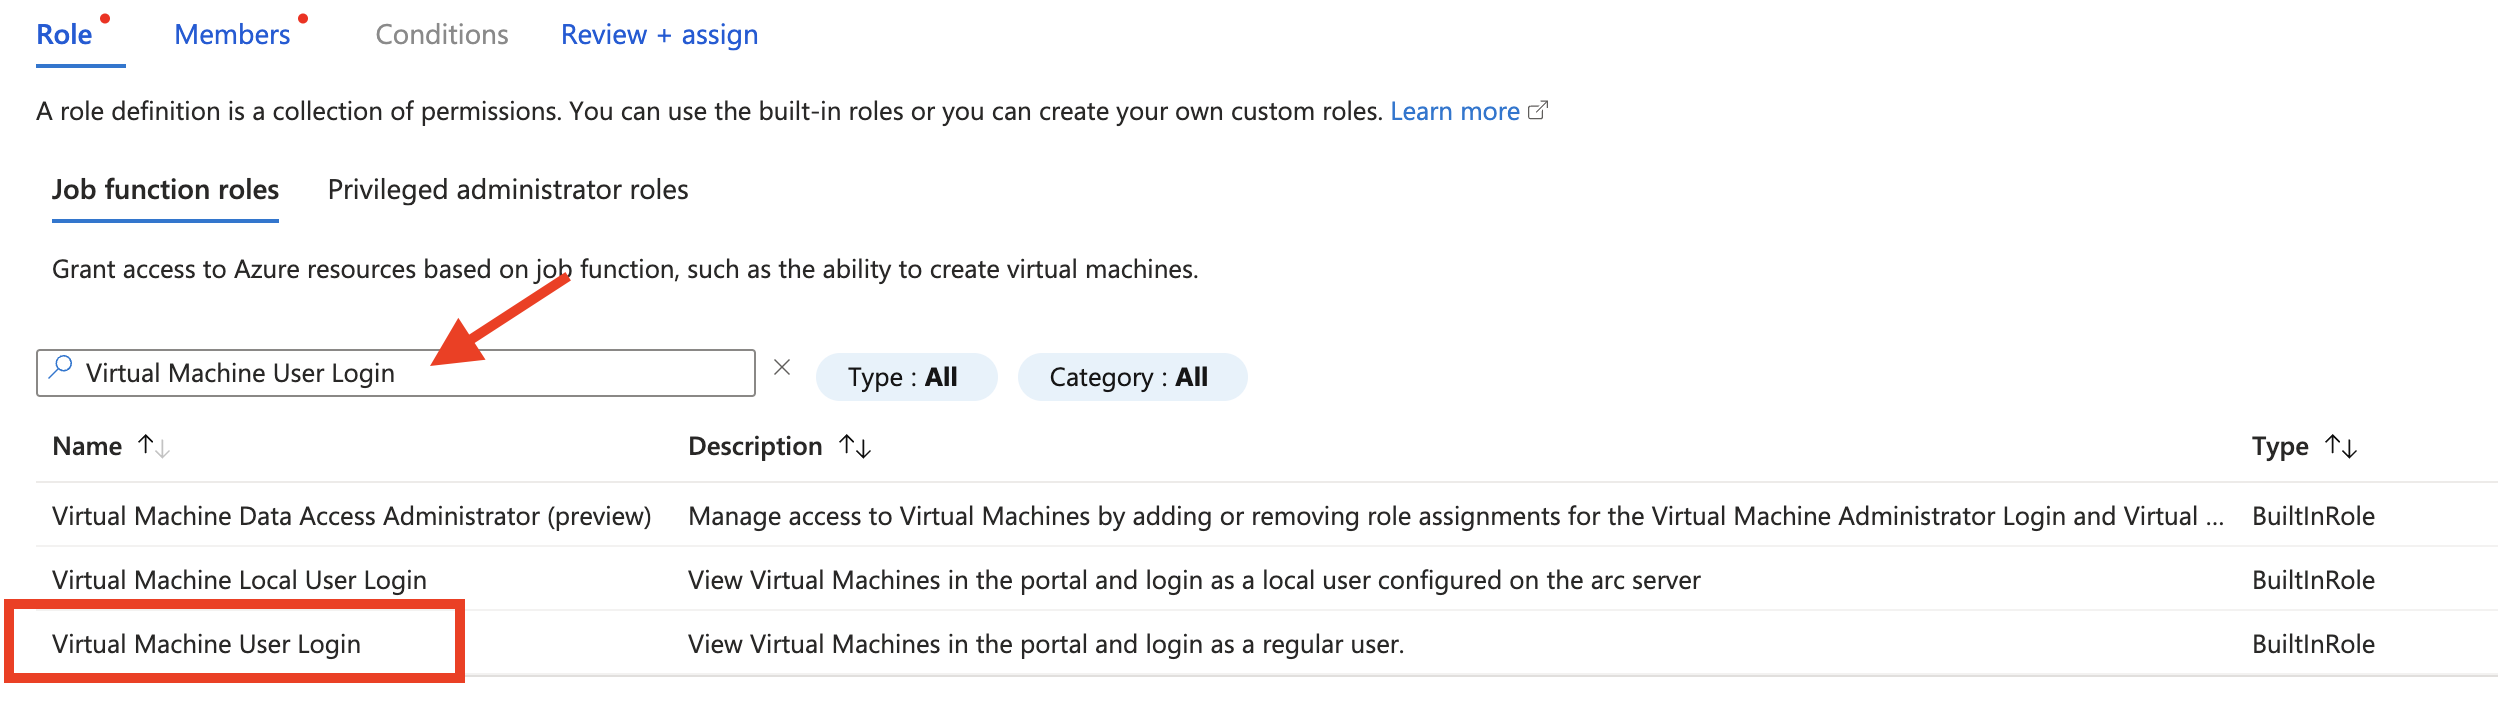
- Click Next

- Click Select members
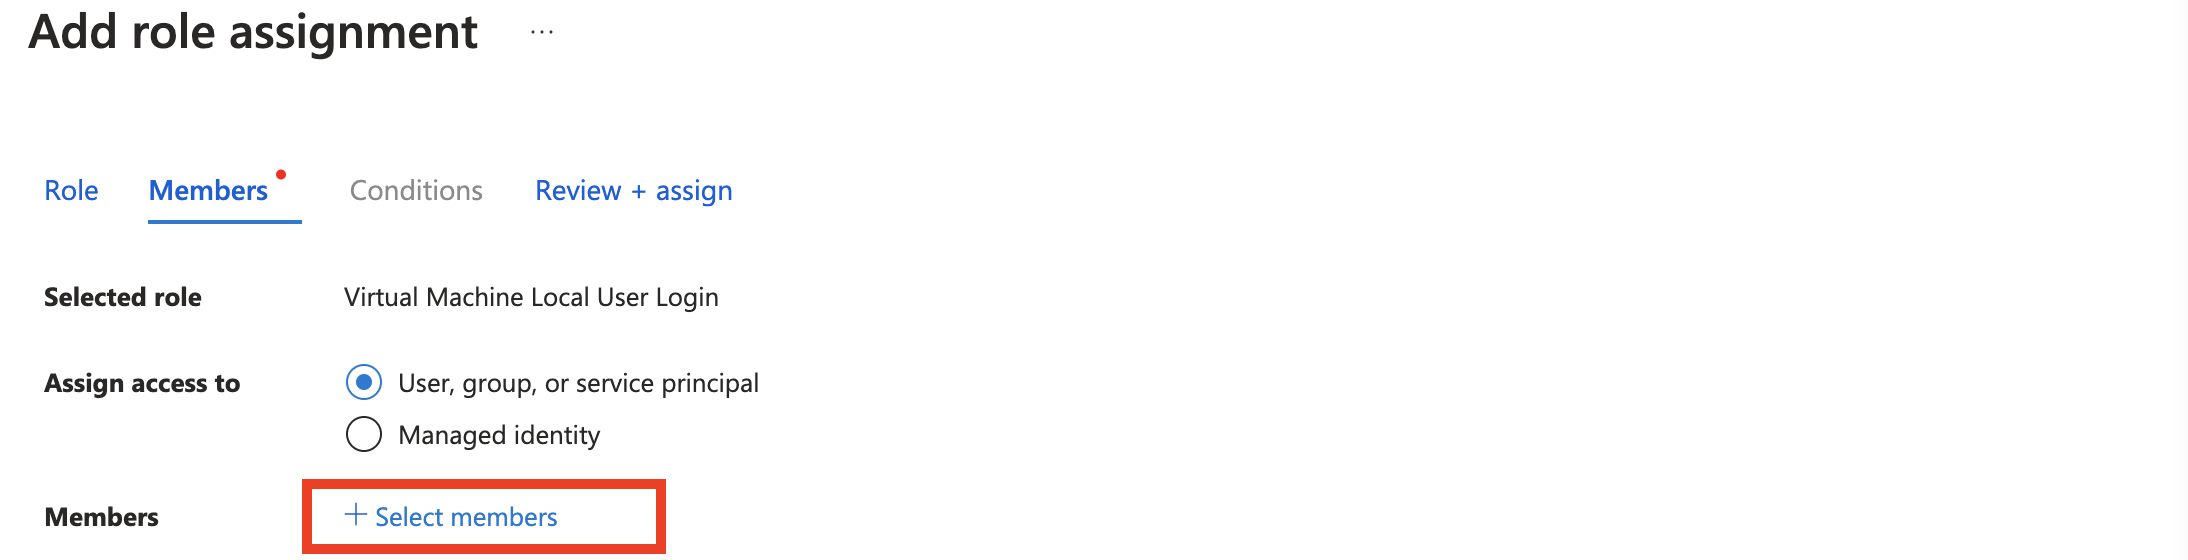
- Search for the application name you created earlier in step 3 and select it

- Click the Select button

- Click Review + assign

Add context integration to Netography Fusion
- Navigate to Settings -> Context Integrations -> Add Integration
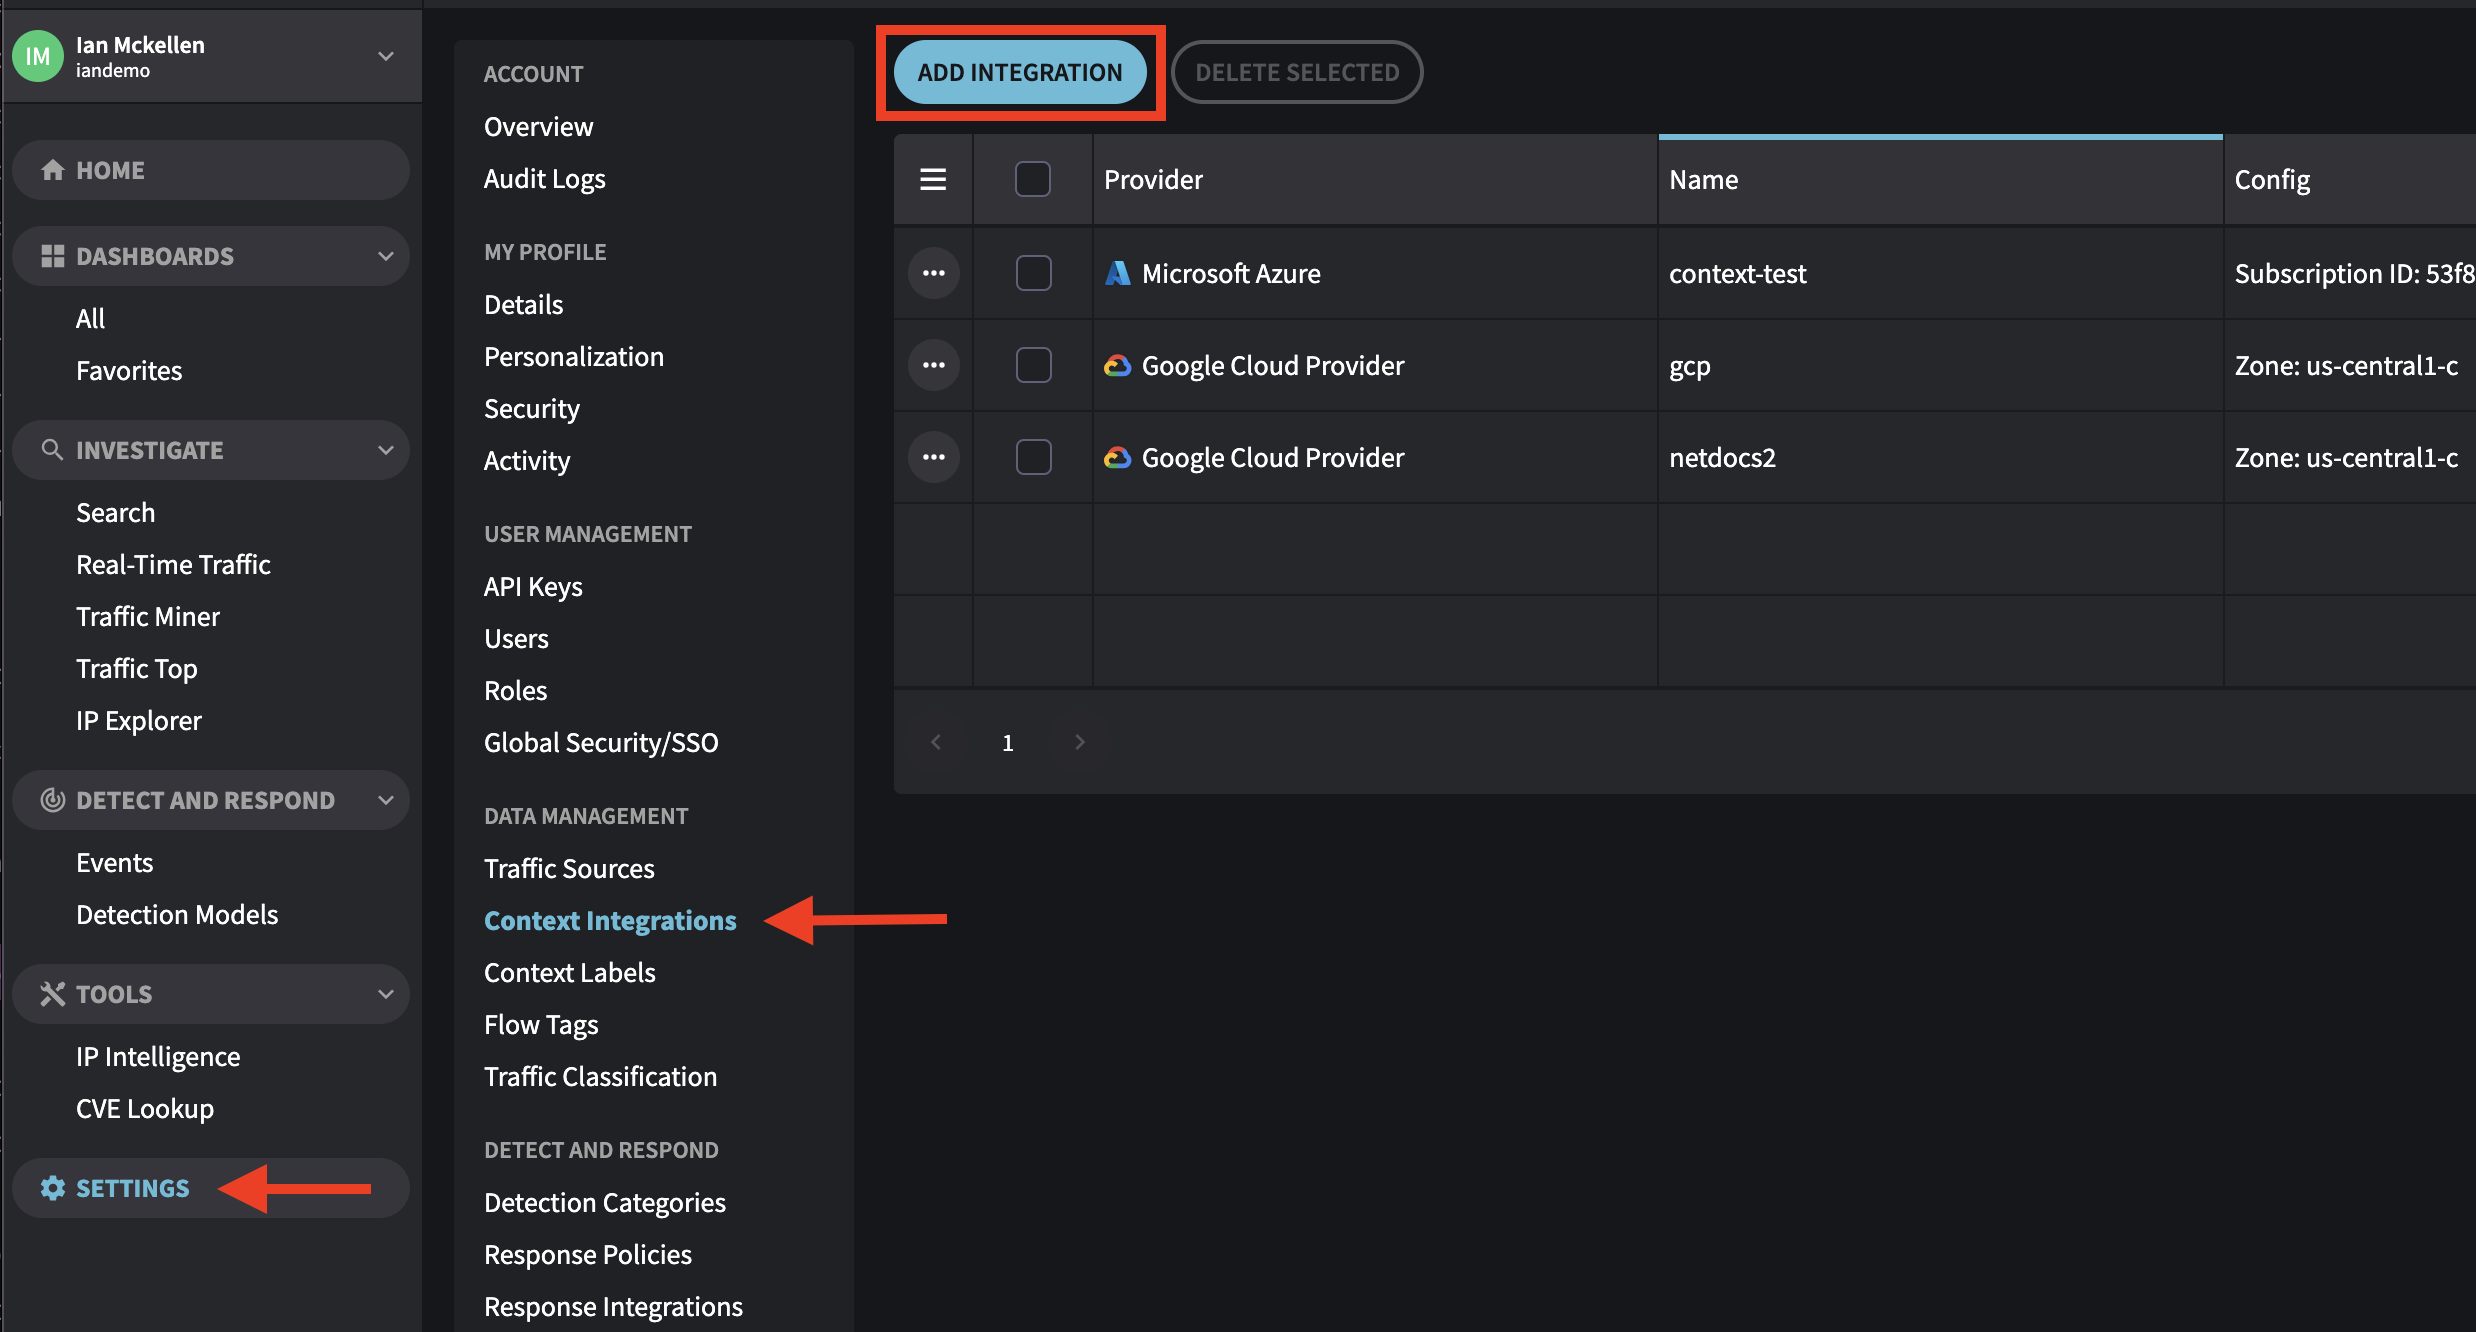
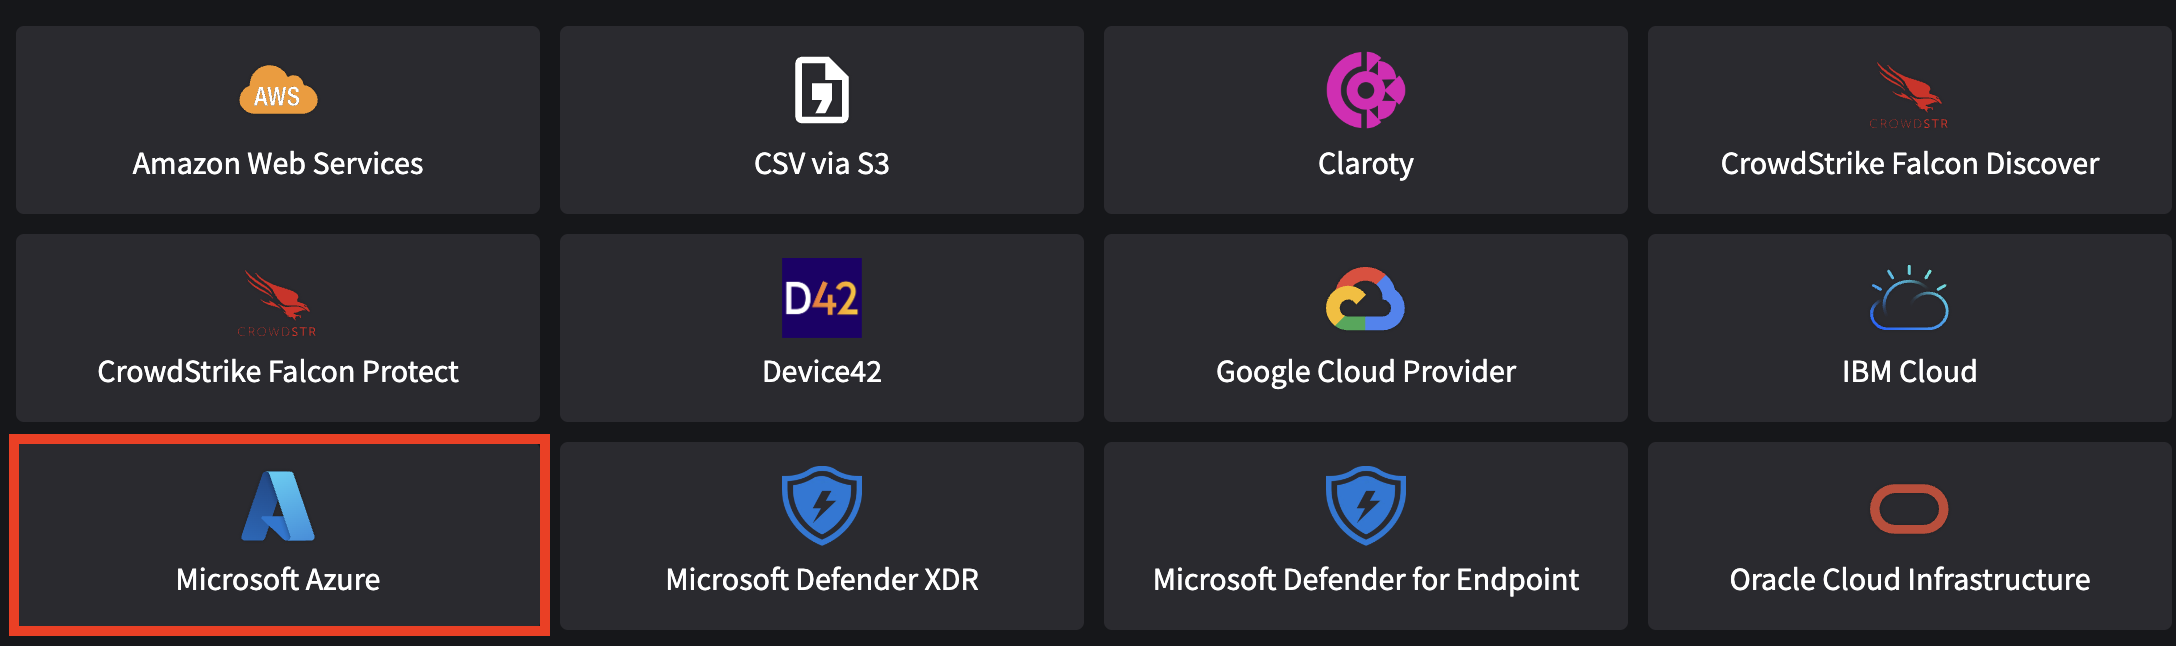
- Select Microsoft Azure
- Fill out the Azure Context Integration form:
Name: Use any name here.
Update Interval: Leave as default.
Auto Update: Leave enabled.
Subscription ID: The Subscription ID you used to complete the previous instructions in this document.
Tenant ID: Your Azure Tenant ID.
Tag/Label Matches: Leave as default unless you know how to use this feature.
Application Client ID: Paste in the "Applicant (client) ID" you copied from a previous step in this document.
Client Secret Value: Paste in the Client Secret Value you copied from a previous step in this document.
- Click Create and Run
Updated about 1 year ago